
Well, I must say that I had a wonderful time at Mechanicon. This event held in West Chester, PA by the folks from the Gaming Garage (game club) held their 2nd annual event, and it was awesome! Friends of mine from the AGBBL (Adventurer's Guild Blood Bowl League) held a 2-day Blood Bowl tournament, our own club: Berks-PA Gaming Club, held Kill Team tournament events and of course the feature event was the Warhammer 40,000 Grand Tournament. We also got to play in a Battle Fleet Gothic tournament as well.
My day started with some BFG, and though it was my first time playing in a tournament, I had gotten the basics down pretty good. I finished up fighting my friend John T. and his Space Marines. While I did a number on his forces by way of damage and victory points, I am still learning, and his Marines focused on the Mission, and won out 4 battle points to 0 in the final game. Still, not a bad time and I ended up getting 2nd place.

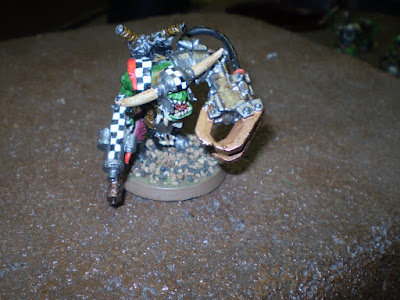
My main focus was to try my hand at the Warhammer 40K GT and bring in my orks of Krogg's Karnage. Staying true to the fluff our our local campaign, the False Hope Crusade, I chose not to use my main warboss, as he was captured during an Apoc game. Instead I used my back up warboss who is not as heavily decked out.
While more in-depth battle reports will be forth coming, I can give a quick overview of each of the five games here. My list for the GT was heavy infantry, using Warbikes to screen the army and have the first wave of attacks come by two mobs of stormboyz each 20 orks strong! It's something I have been having fun with, and my total record for the tournament was 1W, 2T, 2L, but both Losses came at the result of me rolling 1's each time I needed that key "Waaagh!" roll to assault an important unit, instead leaving my boss high and dry, and an easy target for a counter assault in the following player turn.

Still, I had a great time and played against 5 fun opponents! As far as records go, I still managed to finish the best of the Berks Game Club. Ha, ha...that's not saying much for our boys! I also played in a Kill Team tournament and took 2nd overall in that as well!
I had tweaked my list after the 1850 tournament at the Guild by eliminating the Big Mek with Shokk Attack Gun in exchange for my favorite model, Skorponox, who plays as a Deffdread. That being said this is my list and I shall briefly review the performance of my units.
Krogg's Karnage: (Goff Space Orks)
HQ:
Warboss, 'eavy armor, power klaw, kombi-skorcha, cybork body
Troops:
1: 25 ork boyz: choppa & slugga, nob w/'eavy armor, Power Klaw, bosspole.
2: 21 shoota boyz, 2 rokkits, nob with bosspole
3: 15 grots & 1 runtherder
4: 15 grots & 1 runtherder
Elite:
6 tankbustas, 1 w/tankhammer, 1 nob with 'eavy armor, Power Klaw & bosspole
Fast Attack:
1: Bikes: 8, 1 is Nob with Big Choppa and bosspole
2: 20 stormboyz, nob w/ Power Klaw, 'eavy armor, bosspole
3: 20 stormboyz, nob w/ big choppa, 'eavy armor, bosspole
Heavy Support:
1 deffdread: Skorponox, shoota, skorcha, grot riggers, extra armor
3 x killa kans all with rokkit launchas
Big Gunz battery: 3 x Zzap guns, runtherder and 1 ammo runt
--------------------------------------------------------------
Game 1: vs. Razorbacks (Space Wolfs, unregistered) Mission: Annihilation, Deployment: Pitched Battle, Night fight turn 1
Results: Minor Victory for the Pigs/Wolves.
Mechanicon Game 1

My first round opponent was Jeff Payne of the Iron Fist League based out of DC area. Great guy, fun theme. Space Pigs, variant of Space Wolves, but all pig and boar theme. I kept calling out the old theme from the muppets show "Pigs in Space!"
Mission was a tough one, he was a good player, and I lost because of a bad dice roll. I allowed him to go first because it was night fight rules on turn 1. Forgot about those darn acute senses. He was actually happy to have been able to use that ability for once he commented. He deployed mostly in the far right side of the table (my view), so I took mainly the left side, but put shoota boyz in cover and killa kans behind them out of sight.
He had 2 long fang squads, one with 5 missle launchers and one with 3 heavy bolters and 2 lascannons. He hit 20 orks with missles but only killed a couple due to cover saves. Next he moved bikes turboboosting with stormboys close behind. By turn 2, the bikes were in striking distance of the first squad of longfangs and gunned a few down, leaving the rest to the Red Stormboyz to mop up and than jump into cover.

The Big wolf lords and pig pack mashed into my shoota boyz and did a number on them (Wolf Lord and Wolf Lord battle leader), they made short work of the shoota boyz to my right side and took out a killa kan. Next my Kans flanked right and took out most of the pigs in the 'wolf pack' before succumbing to the wolf lords.
The frustrating part was that he kept retreating his troops and had a swift-claw biker pack and attack bike and kept them out of reach of my orks. So the stormboyz jumped all over a razorback and wrecked it, and the other squad took out the mob from a rhino. the lone ork biker split the gap and assaulted the missle launchers, tying them up long enough to spare me a round of shooting.
My positioning was working I had all his troops isolated and cornered. All I needed was the warboss to Waaagh! and close the distance on the two wolf lords who got separated. I figured 25 orks, a nob with powerclaw and a boss with powerclaw should be able to handle 2 wolf lords.
Sadly I rolled a 1. I needed a 3+ as they were 9 inches away. After his next turns movement, his lords were 2 inches away from my orks. He ended up assaulting me with both wolf lords and the swift claw bike pack and did a number on me.

That battle left a very close tilt in the numbers and what should have been a victory for me ended up in a minor victory for the Pigs. Shame too, those Wolf lords would have been worth 900 battle points/victory points had I gotten to them. I still got one and injured the other, but not enough to claim a draw.
-----------------------------------------------------------------------
Atogg, in his disgust over letting the wolf lords escape, rallied his troops. A second attack wave was coming, this time it was White Scar Space Marines. He gathered new bands of orks and headed out to do more battle.
Game 2 Mechanicon: Capture & Control, Spearhead deployment
Result: Draw
Jake Burkette from Pittsburgh and his awesome looking White Scars army was my 2nd game. DJ got to face him inm game 5, and will attest he is a fun and cagey opponent. We assembled our forces, keeping one unit of grots, tankbustas and Skorponox, and the Red mob of stormboyz in reserve. In retrospect, I wish I kept the Red storm boyz on the table instead of deep striking.

White scars went first, scout bikers with auxillary grenade launchers and meltabombs infiltrating, taking scout move by turbo boosting 24 inches and than being in strike range in turn 1 to the rear of the killa kanz. Very clevery indeed sir! Thankfully he failed miserably. All that shooting including Krak missles and lascanons only resulted in one kan lossing is rokkit launcha and 2 stuns, but with squadron rules, just minor and could still move the killa kanz.
He did shoot down 4 of the Ork County Choppas bike mob, and at half strength, they ran away! I really needed them there, because they would have been in range to assault his bike mobs in my turn 1. Instead my white stormboyz leapt over the top of my infantry and assaulted the white scars bike mob, killing 3 of them and sending them off. I pressed forward in consolidation and kept that bike mob running, and spread out the stormboyz to make a cover screen for my infantry.

The Killa Kanz took out the scout bikes and than turned their attention back to the rest of the white scar forces. On a fun note, the G.O.D. (Grots Of Doom) gunned down the scout biker sgt with their grot blastas! He answered back with his Predator and Razorback with lascannon gunning down 2 of the killa kanz, wrecking them. He moved a rhino down my left side hoping to flank around towards my objective and his other troops gunned down 8 of the stormboyz.
In the assault my stormboyz were doing well and inflicted 9 wounds on the White Scars captain, 4 of them from power claws. I only needed 1 claw to get him and kill him instantly by double-toughness rule. He saved them all! Stormboyz ran and got away, Chubby Chekkaz had enough of that fight and would live to tell the tale.
My warboss and his band than crashed into them as the Red stormboyz deep struck behind the Thunderfire cannon and the tankbustas arrived on the left flank and skorponox on the right with more grots. My original grot mob moved into cover midway towards the center right of the battlefield.
The Tankbustas took out the Rhino and than in the next turn assaulted the Marines who had to come out and around to avoid being shot at by the other orks. My Warboss and his band fell back and got run down (Atogg teleports away in the chaos) and the bikes are looking to move in to contest my objective.
The deepstriking stormboyz shot instead of spreading out and than got blasted to all hell by devestator squads and thunderfire cannons and were run off by the end of the turn.
Desperate times call for desperate measures. I moved the shoota boyz off the objective and into range to assault his captain and main bike force. I did the same with the Grots of Doom, and brough my 2nd grot mob onto the board and had them dig into cover around the objective.

The White Scars made short work of the shoota boyz, but failed to run off the Grots of Doom who rolled double-1's for their leadership and held their ground, keeping the bikes tied up and off my objective. The thunderfire cannon, landspeeder typhoons and devestator squads, but the little buggers went to ground and survived! This kept the battle at an even draw!
I made some tactical mistakes in this one and was lucky and happy to pull a draw, my opponent played a very solid game.
--------------------------------------------------------------------
Game 3: Krogg's Karnage vs. Unregistered Witch Hunters
Mission: Table Quarters Deployment: Spearhead
Result: Victory for the Orks! 2 table quarters to 0, (Minor Victory)

I faced off against Frank Uhrich, one of three Witch Hunter armies at this event. All I can say is thank goodness I cut my teeth on Archer's battle sisters over the past couple years. Atogg led his troops to a desolated region that may have one held some agricultural facilities. A river stretched over the eastern side of the battlefield, running from the east to the North. Across the river, the Battle Sisters waited, 3 Rhinos, 2 Immolators and 3 Exorcist tanks.
Spearhead deployment put Atogg as far away as the orks could be and the Sisters pulled back deep into their corner and castled themselves in. Atogg laughed. They may be able to shoot the orks, but they were allowing themselves to be trapped and pinned in. He sent the tankbustas and shoota boyz and a squad of grots into reserve.
The ork bikes raced across the board, turbo boosting 2 turns in a row to close the distance, gain a 3+ cover save and make room for the 2 mobs of stormboyz racing not far behind them. The Zzap gun crews were grossly out of range so started to run foward and move their guns closer. The Killa kanz and deffdread moved up too, but 2 kanz and skorponox got stopped in their tracks by lasgun and Exorcist fire.
Finally when the ork bikes got too close an Immolator moved up and took 3 bikes out with the twin-linked heavy flamer. The entire time I was running the grots up the West end of the battle field to the North West Quadrant. On my turn 3, my 2nd grot mob arrived and I had them dig deep into cover in the southwest corner. Shoota boyz and tankbustas arrived on the Eastern flank, hopiong to get into range into some opposing vehicles.

My turn 3 I hit him hard, or at least tried to. White Stormboyz assaulted the Seraphim to the East and took them out. The bikes shot and assaulted a rhino but failed to do any damage to it, and the Red Storm mob crippled an Immolator.

Witch Hunter turn 3 saw many flamers brought to bear upon the Red stormboyz, and big mob of orks. Red stormboyz got assaulted by the Cannonness, and did 5 wounds to her, but she saved them all. As time raged on the sisters realized that they needed to start getting to table quarters. Orks wrecked an exorcist tank, but the tankbustas failed to take out one that came into the southeast quadrant. The rhino heading south got immobilized by the river.

The cannoness leapt across the table heading West. The rest of the girls tried to gun down Atogg and his boyz. They took out most of the troops but than fell to powerclaw pain in the end. As the Cannoness rushed to get across the battlefield, my opponent forgot to invoke her acts of faith or whatever it is and she put herself in range of the Zzap guns only to be gunned down by grot heavy weapons team.
This secured an ork victory and we won 2 objectives to 1.
--------------------------------------------------------------------
Game 4 Mechanicon
Krogg's Karnage vs. Unregistered Tyranids
Deployment: Pitched battle Mission: Assasinate the command and break the troops:
* 1500 points for killing all troop units
* 650 points for killing all of opponent's HQ units
* Victory Points for units killed (pg 108 rulebook): 1850 points
Maximum total: 4000 points.
Winner: Draw by tournament rule, VP's to Krogg's Karnage: 300+

After holding off three invading units of the imperium, Warboss Atogg returned to his base to discover that a new threat was invading the far reaches of Thrak, where more ruined structures lay, and nothing really of any strategic importance. Still it was not for the orks to share their planet base of operations with anyone, let alone giant space bugs.
As the bugs moved into position the orks identified 3 trygons , 2 Tervigons that create more termagaunts, more gaunts in the back, and two Tyranid Prime warriors each flanked with 3 Hive Guard each. 3 Zoanthropes made up the rest of the force. The bugs closed and didn't account that the orks were going to be just as eager to fight. The mistake made here as the warbikers of the OCC and the White stormboyz leaped front to assault in turn 1, was that the bikes moved in first, blocking out the stormboyz nob with powerclaw, leaving them high and dry and out of the assault.
This would be a slightly costly mistake, and the bikes didn't last long against a Trygon. Zzap guns fired, tankbustas took a shot on another Trygon and wounded it, and the boss took his boyz to the west, trying to cut off a unit led by another Trygon that was looking to take the ork flank.
Still the bugs came in, zoanthropes firing their weapons and trying their best to whittle down ork numbers. The speed of the orks getting stuck in saved them from prolonged fire from the Tyranid bioweapons and the Red stormboyz taking the right flank leapt past the shoota boyz to slam into the Hive Guard and one of the Tyranid Prime warriors. Between shooting and assaults they killed 2 hive guards and won the combat, staying stuck in with them.

The white stormboyz held their own against the massive Trygon and now that the nob and powerclaw got involved, dealt some damage back. On the left flank, Atogg, his nob with powerclaw and the boyz assaulted a pack of Termagaunts and caught the Trygon by default. Eventually the Trygon fell to ordinary attacks from regular boyz as a Tervigon joined the fray. Atogg made short work of that big bug too and cleared out that entire side of the battlefield, still looking for more bugs to slay.
Eventually the white stormboyz fled and the Trygon came through, with another one, the big one (Prime) taking an assault into both the Killa Kanz and the tankbustas. Skorponox came around the back side looking to get into the fray too. The shoota boyz joined into the fight too where more termagaunts and the other Tervigon joined into the fight with the Stormboyz. the stormboyz got run down, but not before they took the HQ tyranid prime out first.

Shoota boyz did some major damage, Atogg in a stand off with the other tyranid prime on the left flank. We stopped as time shorted us at the end of turn 3, wantign to play turn 4. We agreed to tally points and play it out anyway. Lord I wish we had the time for that as my orks came through in a big way.
Zzap gun crews nearly took out one of the Trygons, leaving it with 1 wound left and Skorponox took the Prime down below half hits with shooting! Atogg moved to assault the tyranid prime but cut him and his remaining hive guard down with shooting! That last turn saw a surge of some 1100+ battle points for the orks. So while the battle technically was a tie, the victory points swing was in favor of the orks, who nerfed the HQ of the tyranids and retained their leadership and troops.

I must say that I was happy to see how well my orks held out against such a tough opponent.
-------------------------------------------------------------------
Mechanicon Game 5: vs. Flesh Tearer space marines (Blood Angels codex).
Mission: Sieze Ground (5 objectives) Deployment: Dawn of War: Table Halves
Battle points scored:
500 points for each objective controlled at end of game
400 points if your most expensive unit survives
400 if all your heavy units survive (automatic score if you have none).
400 points if your general survives
300 poitjns if none of your oppononents units are in your deployment zone
Maximum total: 4000 points

Seeing yet another 'agressive' marine force come in and night fight rules, I elected to let the Flesh Tearers go first. As expected shooting was pretty much inneffective for him on the first turn thanks to the night fighting.
His list was as such:
HQ: Libarian, Might of heroes power, shield of sangunius
Elite: 2 sanguinary priest...one with jump pack and blood chalice, the other inside a land raider
Troops: 10 man assault squad, jump infantry flamer, melta gun
Sgt with infernus pistol and powerfist
6 man squad with melta gun and sgt with fist and infernus in a Razorback (twin lascannons)
6 man squad identical to first in Razorback
5 man assault squad in Landraider, melta gun, sgt with infernus and powerfist.
Baal Predator tank with twin-linked assault cannons, heavy bolter, stormbolter
Whirlwind tank
Devestator squad with 2 x missles launcher, 2 x plasma cannon and sgt with power fist and infernus pistol.
I thought that with outnumbering him 149-38 I was in good odds. Like the Space Wolves, he pulled back and tried to bait me to come after him. We are orks, you know we are going to. I kept teasing him to paint his tanks pink if he was going to sit back and hide. In turn 2 he took out a killa kan with a krak missle, the explosion killed 3 orks. The stormboyz in my turn 2 leapt over the top and assaulted the razorback and wrecked it. than his troops came around to bring flamers to bear and assault my troops.

Flesh Tearer shooting killed off half of the 20 stong mob of stormboyz. Chubby Chekkaz took out 3 of them before he fell to their chain blades though. The assault squads came out and took on the bikes and finished them quickly in his turn 3.
On my turn 3, I had a chance to really make an impact. Atogg stood atop a hill looking down at the Flesh Tearer's Librarian. All i needed was a 4+ on my Waaagh and I was sure to get the power claws in on those bastards who kept getting Feel No Pain thanks to the Sanguinary Priest (Oh how I hate them!).
Instead, just like in game 1, when I needed it the most, I rolled a 1! Left my boss sitting out with his boyz as only the red squad of stormboyz assaulted and failed to kill more than 1 of them because of FNP.
The kanz shook the Baal and bought themselves some time and Skorponox came in my rear lines from reserve. At this point I had my objective on the far south west. I had grots running north on the west flank heading towards another objective that my opponent seemed to not care about. Shoota boyz were heading down the middle looking to secure a central objective.
On the eastern side, troops had the North East objecive soundly in their grasp of the Flesh Tearers, and they moved a tank to contest the one in the south east, but had no troops to go claim it. The Red baron and his boyz didnt' last long enough in a fight and the Flesh Tearers came in to seek out the shoota boyz and run them out of the battle.

With the failed waaagh!, the Libararian closed in on Atogg and sucked him into the force weapon he carried (And I feel that this is such a broken rule! Argh!). That cost me the game right there. In redemption, Skorponox came in and assaulted them and took them out and proptly recovered said force weapon.
The shoota boyz got caught in an assault by the Flesh Tearer assault unit, who won the fight and chased them off the field. This allowed the Flesh Tearers to fall back and claim a second objective, locking us in a tie for the primary objectives: 2 each.

He got me on battle points, but only by enough to pull out a Moral victory. I fully feel that had my warboss rolled well on that Waaagh!, I could have done some serious damage to this army.
Such as it was, Krogg's Karnage lost, Atogg is imprisioned and the ork psykers (weirdboyz) are trying to decide if they want to let him out or not or keep him in there until Krogg is recovered.
------------------------------------------------------------------
As I had mentioned, I finished with 1 win, 2 draws, and 2 losses. The losses could have been fixed had I rolled better than a 1 on both waaaghs! in those games. The draws I am convinced that more power weapons are needed in this army.
HQ: Warboss Atogg: He did well, as most bosses tend to do. The biggest issue here was when he rolled 1's twice on key waaaghs! when he did get into combat he did fairly well, exception being the Flesh Tearer librarian with force weapon. Oh how I hate that rule!
Troops: Ork boyz are fragile. No armor. That's why you field in numbers. While the ork boyz did average, not showing their stuff due to bad waaaghs!, they did take down a Trygon before the bosses had to get their powerclaws into it.
Shoota boyz are always solid at holding objectives and dealing damage at medium range as well.
Grots: They all get medals! Grots of Doom kicked major butt this tourney. They tied up white scar bikers and held my objective in game 2 to lock in a tie, and they held the objectives in game 3 secruing me the win! Grots are cheap and fun and silly and I will always use them!
Elite: Tankbustas: I learned now to keep this fragile (read that as unarmored) unit in reserve. They almost took out an exorcist tank but did take on a White Scar Rhino and put a hurting on a Trygon. Sadly they ran away before getting any shots at the Flesh Tearers. Still think it's weak.

Fast attack:
Stormboyz: always solid. biggest issues: only 1 squad has a powerclaw, that's a problem. Other is I screwed up deepstriking a unit and should have just jumped them across the field right behind the other unit. But despite being fragile, their movement of 13-18 inches and up to 6 inch assault range keeps them deadly as ever.

Warbikers: did better than average this weekend. Game 1 they held their own and the nob even got a chance to assault a long fang (space wolf devestators) squad. Their rolling cover allowed my troops room to move, but are still expensive.
Heavy Support:
Killa Kanz: The kanz didn't get to do a whole lot this game, but they sure did draw a lot of attention. The armor 11 is not so sound when going in against lascannons. Thinking they need a big mek with them with a force field for cover saves.
Deff Dread: Skorponox. What can I say? it's skorponox, he rules! Period. Got taken out in game 2 with an exorcist shooting at him in turn 1 or 2. Was keeping him in reserve almost every game. He also draws lots of attention, as it is hard to ignore that model. Held ground in game 1, taken out in game 3, in game 2 he was a non factor other than guarding my objective and drawingm fire, Game 4 hurt some nids, and Game 5 killed the enemy commander (Librarian).

Big Gunz: Zzap gun crews. Range 36 (low), but variable strength and AP2 is just what the doctor ordered for taking on armor, shooting down the big monsters, and of course picking off characters. Game 1 shot some vehicles. Game 2 took on some bikes, game 3 picked off the cannonness running to take my table quarters. Game 4 picked off some Trygons, and kept Blood Angel tanks at bay in game 5.