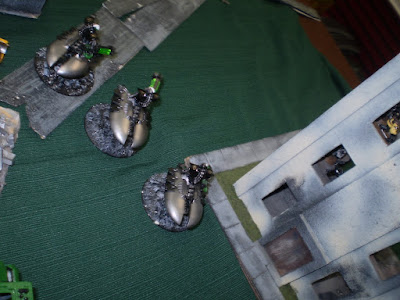
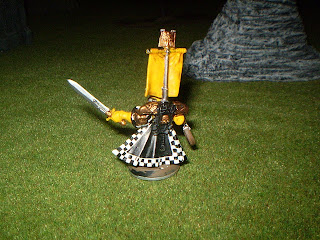
Orks of
Krogg's Karnage vs. the Slaneesh Chaos Marines of the Heartbreakers.
Mission: Pillage: Chaos Marines Mission 1 from Battle Missions Book
Objective: 5 Loot & Pillage markers would be placed as per a Seize Ground Mission. Scoring would start at the end of your opponent's turn. Chaos Marines scored 1 Loot point for each marker they were in BASE contact with (not in assaults or falling back). Orks would score one Salvage point for each marker they were in BASE contact with at the end of the game, not engaged in an assault or falling back. Scoring would take place EVERY turn.
Points: 1850 Deployment: modified Spearhead (Table Quarters, but only 1 HQ and up to 2 troops, all other units are in Reserves). Fort Hungstun.
It was no secret that the Daemon Princess Jenna would be wanting to strike at such a "comically" named place. Looking for a good fight, Warlord Krogg Satogg took lead of a strike team to intercept the Chaos Marines, in an attempt to claim some much needed supplies, and take the fight to the Marines, so as to show them who truly owns supremacy in this sector.
Ork forces deployed as follows: 1850 points
* Warboss with Mega Armor, bosspole, cybork body, ammo runt, kombi shoota-skorcha
* Big Mek with Kustom Force Field, and 'eavy armor
* 10 'ard boyz with Nob w/ big Choppa in wartrukk (Ork-Vee with Warboss riding inside)
* 11 'ard boyz with Nob w/power claw, bosspole, Kombi shoota-skorcha in wartrukk (big Mek riding inside)
* 20 shoota boyz with Nob w/ bosspole. 2 rokkit launchas
* 27 ork boyz (slugga boyz), 2/ 2 x Big shootas, Nob w/'eavy armor, powerclaw, bosspole
* 15 Gretchin & runtherder
* 20 x Stormboyz (red storm): Nob: 'eavy armor, bosspole, big choppa
* 20 x Stormboyz (white storm): Nob: 'eavy armor, bosspole, power claw
* 5 x tankbustas, 2 bomb squigs, 1 tankhammer
* 3 x Killa kanz mob (big shoota, rokkit launcha, grotzooka)
* Big gunz: 3 x Zzap guns, +3 extra crew, runtherder
---------------------------------------------------------------------------------
Prior to both parties deploying their forces, both the orks and the Chaos Marines had the idea of ome orbital bombardment. No matter what happened, it seemed that both forces were intent upon causing as much mayhem and destruction to the local populace. It was simply a matter of who was going to collect the most prizes after the long-range destruction was complete. Chaos Marines deployed in their landers and gunships. Both forces had located a 'hot-spot" of technology and components around what now was a pulverized fortress, an outpost in the wilderness with a couple of support buildings. Between the heavy bombardment of lascannon fire from the marines and meteoric rock drops from the orks, not much was left intact.

The Hearbreakers arrived from the Northeast quadrant of the battlefield. A unit of Noise Marines set up a defensive position in a ruined structure that also was the location of an important objecive marker. Daemon Princess Jenna leaped forward, her wings carrying her close to the central fortress now a ruined pile that still housed critical military components. Along the Eastern front, a large unit of traitorous marines tainted by Nurgle, led by what appeared to be a festered ork boss in Marine colors led the bunch.
The battlefield had the fort located in the center with one loot objective. On the Eastern side (My right), one was in a ruined building in the south east, and one in a building in the North East. On the Western flank one objective was centrally located not in cover at all. to the North West, amid a cluster of rocky buttes lay another.
On the South West quadrant, An ork wartrukk with the Big Mek and 11 'ard boyz positioned by the SW objective. The mob of 20 shoota boyz joined them as well, just behind, hoping to stay out of range of the Chaos weapons to start the game.
Chaos Turn 1: the Heartbreakers concentrated on movement and positioning to start the match. Daemon Princess Jenna leaped towards the central objective in the ruined fort. The Nurgle troops marched south along the Eastern front, almost tripping over their own feet in their pathetic attempt at running. The Blast Master with the Noise Marines fired a salvo toward the orks. They were mostly out of range, and between his and Jenna's attempts, the Ork Force Field held strong. Orks were in possession of 1 Salvage counter at the end of the turn.

Ork turn 1: Seeing their main target moving close, the shoota boyz urged forward hoping to close distance with Jenna. Only 4 of them got into range, 2 armed with shootas and 2 armed with WPG (Waaagh Propelled Grenade) Rokkit Launchas. Their shots would strike true, hitting 4 out of 6 times, causing 2 wounds to the Daemon Princess. The trukk moved closer to the NW objective, deploying the 'ard boyz who ran into the cover of the rocky buttes, trying to close in on the NW objective. The shoota boyz kept the tail end of their mob in contact with the SW Objective. Chaos Marines scored 2 Loot counters.

Chaos Turn 2: Dice gods were with the Heartbreakers, who made a whopping 4 reserve rolls! A predator tank, another squad of Noise Marines, a Rhino with Havoc Launcher and Beserkers on board, and a defiler (that looked like a converted soulgrinder) all rumbled into view. They manuvered to get a better line on the orks. The Nurgle marines continued to move (slowly) south on the Eastern front. The predator fired a lascannon shot into the wartrukk, but the Big Mek's custom force field kept it and most of the ork warriors safe from enemy fire.
Daemon Princess Jenna moved out of the ruined structure and attempted to use her "Lash of Slaneesh" to pull the shoota boyz mob closer to her (Eric rolled snake eyes). Still, it was just enough to get the Princess in range to assault the orks. She managed to kill 4 of the orks, but the orks were too numerous and hungry for battle and pulled the Daemon Princess down. Weather Jenna was cut down or chose that time to teleport away the orks did not know, nor care, as she was gone from the battle and they were free to go kill some more.
Orks were in posession of 2 Salvage Markers: Score: orks 3, Chaos: 2
Ork turn 2: The orks didn't do near as well as the Chaos marines on reserve rolls, but 3 units did arrive. The Killa Kanz mob arrived in the south west, looking to possibly make their way east towards the Nurgle marines. The Red Storm mob of Stormboyz led by Da Red Baron arrived, dropping in from high above. Coming in off an overhead 'Chinork' Warcopta, the Stormboyz landed (deep strike) around the central ruined fortress. With the Daemon Princess gone, the stormboyz were free to run and secure their position inside the structure, positioning themselves for cover.
Warlord Krogg Satogg arrived upon his Ork-Vee wartrukk. His band of 'ard boyz rolled forth securing the SW objective, allowing the shoota boyz to move forward and attempt to shoot rokkits into the chaos rhino, but to no avail. The other 'ard boyz with the Big Mek moved to secure the NW objective and the Big Mek tried to keep his Kustom Force Field around centralized to protect as many of his companions as possible.
Heartbreakers were still in posession of 2 Loot counters: Score: orks:3, Chaos :4
Chaos turn 3: More troops by the Heartbreakers arrive. A pair of Obliterators (Ron & John) deep struck right infront of the Killa Kanz. The grot pilots screamed in terror as the Obliterators appendages morphed into Melta guns. Their surprise attack destroyed 2 of the kanz, incinerating them into piles of twisted wreckage. The Beserkers on the North central part of the battlefield disembarked from their transport and lunged forward in hopes to assault the 'ard boyz inside the cover of the rocky buttes. Needed a 3 or 4 to make the assault, the Beserkers rolled a 1 and a 2 for their difficult terrain roll, falling short and unable to assault the ork warriors.
The Nurgle Marines finally made it to the South East objective and took up a position inside the ruined building. The Predator fired again into the ork wartrukks, only to see it's shot fizzle as it impacted the Big Mek's force field once again. The remaining orks fired all of their shots into the Red Stormboyz mob central in the ruins. The orks made excellent use of cover, only losing 3 of their 20-man strong unit to incoming fire. Things were looking very grim for the Heartbreakers this turn.
Krogg's Karnage was in possession of 3 Salvage counters: Score: Orks 6, Chaos 4
Orks turn 3: More ork reserves arrived this turn. A large mob of boyz (Alfa Skwad) led by ork nob "Gunzor" came into the field right by the wrecked killa kanz and where the obliterators stood. The orks pumped slugga fire into them, gunning one of the twisted walkers down. The Lone Killa kan marched Eastward, hoping to get into battle with the Nurgle Plague marines. Along with the large mob of orks, the gretchin mobs arrived, both the foot-sloggers and the Zzap guns crews. The Tankbustas also arrived, but were too far out of range to shoot any chaos vehicles yet.
The 'ard boyz to the NW moved and assaulted the Berskers, killed 3 of them, but took heavier casualties and in the end were run down by the awaiting chaos marines. The Stormboyz in the center of the ruins chose to abandon their post and leap forward. Their blitz attack saw the Squad of Noise Marines in the central North cut down to a man, the Orks than scrambling into the nearby woods to grab onto more cover.
The Shoota boyz moved to shoot the Rhino to the North West again and failed. Warlord Krogg and his men held their position, waiting for a foe to attack, moving their trukk into better position.
Chaos Marines were still in posession of 2 Loot counters: Score: orks: 6, chaos: 6
Chaos turn 4: Persitency is sometimes rewarded and this time the Predator tank found a seam in the ork force field and took out the engine to the Warboss's Ork-Vee. Despite the ramshackle construction of the vehicle, it simply just shut down, the motor ruined, but nothing else. Warlord Krogg Satogg ordered his orks to bail out and prepare to embark into the Big Mek's trukk that was right next to theirs.
The Beserkers left the Big Mek to the fire power of the Havoc launcher equipped Rhino. Theu instead charged around the rocky buttes and took out the remaining shoota boyz.
The Big Mek had secured the NW objective as the 'ard boyz ran to assault the Beserkers. He was not prepared for the 'ard boyz to be wiped out so quickly and than found himself falling to enemy fire despite the power of his Kustom Force Field. The Nurgle Marines held their position in the SE. Noise marines kept pouring fire into advancing ork hordes. The chaos marines in the 2nd Rhino with Havoc Launcher deployed and fired 4 flamethrowers into the woods, burning out the stormboyz. Concentrated fire gunned down a dozen of the greenskins, leaving just The Red Baron himself, the Stormboyz Nob, smoking and charred, but unhurt. The Defiler closed into the center ruins, trying to get position on the central objective.
Orks were in possession of just 1 Salvage counter: Score: orks: 7, Chaos: 6
Ork turn 4: Orks moved again, the White Stormboyz led by Nob "Chubby Chekkaz" arriving and moving East and south to seek out the Nurgle marines. They would fire their sluggas into the building harmlessly and than assault the troops inside. Chubby Chekkaz missed with his powerclaw, but the troops were still numeroius enough to hold their ground. The large mob of orks made their way towards the central objective, calling out a Waaagh! The shoota boyz moved to get position on the Beserkers and fired a hail of gunfire their way. The Killa kan managed to finally hurt one of the Nurgle troops with the Grotzooka (they had made their "Feel No Pain" rolls all game long....).
The shoota boyz were wiped out, but the Beserkers were just in range for Warlord Krogg to lead the attack. His large mob fell short in the difficult terrain to join into the fray. The Ork warlord would prove to be too much for even Khorne Beserkers and would cut them down to a man with his mob of 'ard boyz alongside of him.
On the North East, The Red Baron ignighted his jump pack and landed behind the Rhino armed with the Havoc Launcher. With a series of well placed blows from his Big Choppa exploded the fuel tank and caused the machine to explode in a cloud of shrapnel. The Red Baron smiled in his efforts.
Chaos Marines were in possession of 1 Loot objective: Score: Orks: 6, Chaos: 7.
Chaos turn 5: The Chaos marines continued to fight, the tactical squad that was heading West now turned their attention back East due to the carnage caused by The Red Baron. They would concentrate their fire into him with the Noise Marines on the East and cause a flare up into his Rokkit Pack, and the Red Baron's pack exploded in a plume and trail of black smoke sending the nob high into the sky and off to the North, never to be seen the rest of the battle.
The Defiler/soulgrinder was secured on the middle objective, fired it's battle cannon harmlessly between all ork units.
The Nurgle troops pulled down the last of the Stormboyz from the white mob, their feel-no-pain ability keeping them mostly intact, only losing 2 troops. Chubby Chekkas threw his boyz into hsi path, igniting his rokkit pack and making his escape before he got pulled down with the rest of his mob. The Nurgle Marines pulled back to consolidate by the SE objective again.8
Orks were in possession of 1 Salvage Objective, score: Orks : 7, Chaos 7.
Orks turn 5: Trying to cut down the marines and even the score the orks of Kroggs' Karnage struck out. Combined efforts of the Tankbustas unleashing a bomb squig and fire from the Zzap guns caused damage to the defiler, taking out a claw, it's battlecannon and immoblizing it by crippling one of it's legs. Still, the large machine sat securely upon the central objective.
The large mob of ork boyz had moved into the ruined keep, looking to at least deny the Defiler the ability to score points on the central objective in the ruined fort.
The lone killa kan tried to closed on the Nurgle marines, killed one more with it's Grotzooka, but was just outside of range to assault them insde the building. The lone ork wartrukk kept moving around, lending it's big shoota into firing into any enemy it could find. Warlord Krogg Satogg ran forth and once again with his 'ard boyz and secured the NW objective.
Heartbreakers were back in possession of 2 Loot markers,: Score: orks 7, Chaos: 9.
Chaos Turn 6: The battle was far from over and the Marines had to find a way to finish the horde of orks off. The rhino with Havoc Launcher left in the NW drew a bead on the Ork Warlord, but falied to target him within the rocky confines of the buttes. The defiler in the central ruins was still engaged with the orks, and the Nob with is powerclaw was able to pile in. Despite losing a couple of orks, the Nob Gunzor, tore the Defiler in half, ripping the top part from the lower and left its remains clatter down the side of the fortress. Orks consolidated closer south east towards the Nurgle troops, but still in possession of the central objective.
The Nurgle marines blasted the lone killa kan with a pair of Melta guns, causing the grot-powerd device to explode in a cloud of fire and shrapnel. Orks loomed in the middle of the battle field, this battle was far from over.
The Grots of Doom held the SW objective. Orks in possession scoring 3 Salvage markers: Score: Orks: 10, Chaos: 9
Ork turn 6: Doing their best to secure this game, the orks tried to take out as many Marines as they could. In the Northwest, the remaining 'ard boyz of Krogg's truck mob took over holding his objective. Warlord Krogg rumbed forth and sunk his powerclaw into the chaos Rhino, tearing the machine apart into shreds of scrap metal.
The Grots of Doom held onto their objective in the South West. Zzap gun crews tried to shoot at the nugle Marines in the south East, and the Tankbustas kept running forth, shooting some rokkits into the direction of the Predator tank.
The lone wartrukk and crew raced their vehicle into the ruined fortress and positioned themselves to keep the central objective while Gunzor led his mob down the bluff and south east to confront the Nurgle troops. The orks were in possession of 3 objectives, but needed this game to go another turn to have a chance at a win.
One last chance to pull victory from the marines: Nob Gunzor and his band of orks, still over 20 strong, had to assault the Nurgle Marines to the SE, keeping them from being able to score at the end of the turn. They were 3 1/2 inches away and needed a 4+. The dice roll was a 3! The orks failed to assault the Nurgle troops.
Heartbreakers (barely) in possession of 2 loot counters. Score: Orks: 10, Chaos: 11
----------------------------------------------------------------------------------------------------------
The Game ended on turn 6. In a standard Seize Ground mission, this would have been an Ork victory. But it wasn't. This was a battle missions game. This was an INCREDIBLE fight and a very enjoyable game. I can look back and second guess myself on some things. Should I have kept the Red Stormboyz in the central objective one more time and risked another round of fire? Good chance the Defiler could have closed the distance to assault them had I not moved them. The Beserkers failing their first assault was matched by my own orks failing their difficult ground move for the final assault, which would have resulted in a 10-10 tie. Victory points wise this was a close battle, but was in favor of the orks, no doubt there.
As for Eric Bates, he now gains the honor of one of the few Berks 40K club members to pull a victory off on me. This game was so fun and Eric is such a great opponent to play. He knows his army, his fluff is fun, and he's just a fun guy to play against. I look forward to a rematch with him again sometime. As for the rest of you.......I suggest you try this mission out, it was Extremely fun and changed tactics from the standard Seize ground style, since you can score points every turn.
---------------------------------------------------------------------------------------------
In the aftermath of the battle, Warlord Krogg took out the Chaos Rhino. It had seemed as though the dark marines had slithered away under the cover of smoke from the battlefield. While the Heartbreakers made off with the better parts of the choice loot, the orks could rest assured that they had a good fight and collected a substantial amount of wargear themselves. Their leader was taken out and to Warlord Krogg Satogg, that in and of itself was a victory. The Big Mek appeared, injured but not dead. Krogg was surprised, but the Mek's addition to his warband no doubt was a good one. They made their way back into their wartrukk, using cables and ropes to tow the second trukk back to the ork camp.
The orks loaded up their equipment. "We are not done fightin' here..." the ork warlord proclaimed. ".....we will go through our loot and than plan another raid!"
A cheer went up from the surviving orks of the battle, still well over half the warband was intact. Now it was time to collect equipment rebuild and plan for another fight.