Berks Spring Assault 4!

Berks Spring Assault 4!
Berks Spring Assault 4! Warhammer 40K tournament

Berks Warhammer 40K Group

Showing posts with label False Hope Crusade. Show all posts

Monday, January 10, 2011

Warhammer 40K Battle Report: Orks vs. Eldar

False Hope Crusade Battle Report:  Warhammer 40,000:  Orks vs. Eldar

Waaagh Karnage! vs. Amohan-Tep Craftworld.
Orks vs. Eldar in an 1850 point Annihilation game
Deployment: Dawn of War.
Ork Victory: 1700 Victory Points to 630. (It was really, really bad for the Eldar!)
Planet: Orritus
Photobucket
* With Orks celebrating the bounty claim of Captain Bruno of the Star Dragons space marine chapter, and reports of their warlord Krogg Magogg Satogg still alive, morale was up in Kamp Karange, the base of operations on Thrak for the orks. Four Kill Kroozers were dispatched to meet with the Dragon Warriors to claim the bounty of Captain Bruno and break out into different areas with small fleets thanks to Admiral Dakkabar directing the space forces of the ork clans.

While Imperial forces gave chase after the Ork Admiral, the Kroozers broke formation, randomly bringing strike forces and raiding parties into various subsectors of the False Hope Sector. One such strike team was led by a cunning Warboss from the Goff clans, Tirog Magogg, yet another foul spore-son of Krogg and Ghazkull. Tirog was just the newest member of the Goff clan to attempt to step up to the role of temporary warband leader. But this warlord had the blessings of the Warphead, Eggogg Maggog, the ork psyker of Waaagh Karnage.
Photobucket
Looking to pillage nearby to Thrak, Tirog led a strike team and as they made landfall, dispatched different teams across the planet's surface. He led one such warband through a rural area where a river cut through a valley, where rolling hills concealed a runined outpost that Ork fighta-bombas had just laid to waste. They were moving in to clean the area and see if anything of intrest lay in the area.

Unbeknownst to the orks at the time, an Eldar hunting team from Craftworld Amohan-Tep was in the area tracking their ship. They have had spies following the progress of the infamous "Bruno Bounty" themselves and had even thought about turning on the loyalist forces to claim the prize as their own. Since the Dragon Warriors had captured Captain Bruno, perhaps the Eldar were hoping to rescue the captain and make a deal or cash in on a reward from the Star Dragons?

No matter the motiviation, the Eldar tracked the orks to Orritus and laid in wait, hoping to unleash a surprise attack as the orks moved through the cover of darkness, reaching their target location just before dawn. Yes, it was the Dawn of War between Orks and Eldar. Seeing their hated foe, the Eldar leaders had only one mission on their mind. Kill them. Kill them all.

Photobucket
(Ork turn 1)
As the Orks moved forward, the Big Mek Squigtooth was mobbed up with a large group of ork boyz, carrying his Kustom Force Field projector on his back. A small squad of gretchin led by a runtherder took the point before them, the Mek using the gretchin as a cover screen.

As they made their way around the eastern side of the river and around the ruined outpost, it looked as if the area was bare and no enemy forces could be sighted. Backing them up would be a mob of Killa Kanz, more gretchin with Zzap Guns took position into the woods to the south west. Stormboyz from the White squad, led by the infamous "Chubby Chekkaz" raced down the eastern flank, bringing themselves in range of the Mek's force field.

Tirog would back up in reserve with a large mob of shoota boyz (orks with machine guns), the new "Red Baron", trained by Boss Zagstruk himself and Da Vulcha Boyz, took to the air in a customized Ork Bomber, and would arrive later. Another Ork Runterder Vogg Magogg, would back up the forces with the G.O.D. (Grots Of Doom), and the cunning Nob Orkold Shwarzenorker would lead a team of Karnage Kommandos dubbed "The Destructive Dozen" in a, outflanking approach to the battle scene.
Photobucket
(Eldar turn 1) (everything was held off the table for Dawn of War deployment). What did manage to come to the scene hoped to take the orks on by surprise. As two Falcon Grav-Tanks came down the North West ridge line, they were backed up by Eldar foot troops. One tank held a squad of Dire Avengers, and the other Dragon Warriors for anti-armor capabilities. Snipers snuck into the flowing river hoping to use their cunning camoflage tactics to conceal their positions and pick off ork troops.

To the central North, Warp Spider troops appeared and fired shots into the Ork mob and grots advancing down the Eastern flank. To the North East, an Eldar Seer Council on jetbikes sprung forth from the cover of darkness and unleashed fire and projectiles into the gretchin mob and orks. By some act of luck, a handful of gretchin survived, no doubt to the aid of the Kustom Force Field carried by the Big Mek. The Seer Council wanted to assault the ork mob behind the gretchin, but despite defensive measures taken by the grots, they would not be able to advance past them and also reach the orks.
The few remaining gretchin were no match for the Eldar and were cut down or ran, but delayed them enough to set the orks up for an assault of their own.
Photobucket
(Ork turn 2)
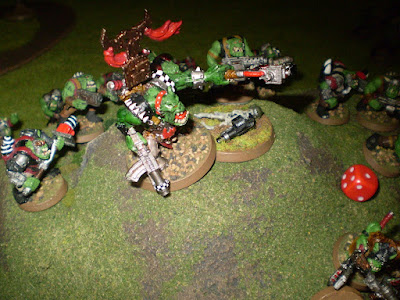
The cover of darkness gave way to the dawning of the morning sunlight upon the battlefield on Orritus. The roar of turbine jet engines announced the arrival of "Da Flyin' Circumstances", trained by Da Vulcha Boyz...(count as), Da Red Baron had arrived and his mob of stormboyz decended from the sky from their transport and impacted the ground right where the Eldar Warp Spiders had teleported to, closer to the Western side of the battlefield. Performing a daring assault, 2 of the boyz were caught in the "Death From Above" manuver, as they slammed into the Warp Spiders.
Photobucket
On the Eastern Flank, Big Mek Squigtooth urged his mob of orks forward and they ran up to shoot their sluggas at and than assault the Seer Council. Even worse for the Eldar was that the White Storm mob of stormboyz kicked their packs into high thrust (18 inches jump!) and landed just aside of them, 20 stormboyz joining 30 ork boyz in an assault on a 5 or 6 man eldar seer council. This was going to be bloody.  (Somewhere in the neighborhood of 140 attacks!)
Photobucket
ZZap gun crews had dug in positions in the woods, but failed to hit anything. Killa Kanz moved to the ruined outpost structure, climbing the smoky ruins but failing to shoot rokkits into anything.  In the Assaults the Red Baron and his boyz killed all but 2 of the Warp Spiders, who remained locked in combat with them. On the East, The combined mobs of orks killed all but one from the Seer Council, but the brave warrior held on, keeping the mob of orks locked in combat with him, but not the stormboyz any more.
Photobucket
(Eldar turn 2)
Reinforcements would arrive for the Eldar, a troupe of Harlequins led by a Troupe Master came in leaping and bounding over ruined rocks and trees, and leapt into battle with the unengaged Stormboyz from White Storm squad. The Falcon Grav tanks moved forward, trying to throw some firepower into the ork lines. They managed to damage a killa kan and kill a couple of orks. Eldar snipers also tried to take out the kans from a distance but failed, just impacting on the armored front of the grot-piloted walkers.

The eldar Warp Spiders didn't last long against the Red Baron, but killed a few more orks before they died. So too did the Harlequins, who did a number on the White storm mob.
Photobucket
(Ork turn 3):
Finally the Warboss, shoota boyz and G.O.D. showed up to the scene. The Grots Of Doom took up position around their friends with the Zzap guns, looking to counter any infantry threat from the Eldar. The Boss, Tirog Magogg, marched his shoota boyz up the center of the battlefield, dissapointed that no Eldar forces were in range of his men or their guns.
Having finished off the last of the Eldar Jetbikes and seer council, the Big Mek and Nob took their mob of orks over to the aid of their stormboyz friends and joined in the fray with the Harlequins. Not dying easily, the Harlequins took out a number of orks before they were cut down to a man. This allowed the orks to spread out again, the storm boyz hugging the ridge line to the East, but staying in cover range of the Mek's Kustom Forcefield.
Photobucket
On the Western flank, having dispatched the warp spiders and taking cover in the river, the Red Baron (Zagstruk) and his men took to the air again and came crashing down into one of the eldar sniper units hiding in the cover of the river and river bank. They would shoot down a few and assault them and kill off that squad of troops, and than take cover inside the river as well, but lost a few orks to the swift and dangerous current of the river.
Photobucket
(Eldar turn 3):
Running out of forces quickly, the Eldar had to comepensate for their gross under-estimation of the Ork forces at hand. They did not anticipate their speed in counterminding their well thought out plans of attack. One Falcon Grav Tank raced south and West and deployed the Dragon Aspect Warriors in the face of the Killa kanz. The resulting melta weapons fire damaged one kan and completely destroyed another. They would than assault the remaining kanz and placed a melta-bomb on one and caused it to become a wreck as well, leaving just one that was shaken.

The other Flacon Grav Tank cut Eastward and deployed the Dire Avengers, who popped out and laid down a hail of fire into the ork mob with aid from the grav tank. They were too eager however, as they managed to gun down the front line of orks, leaving the next wave back from them a bit inside difficult terrain 5 inches away. (They rolled a 3 on the assault).
Photobucket
(Ork turn 4)
Sensing more blood, the orks sprung into action yet again. On the Western flank, they had already finished off Warp Spiders and one sniper squad. Da Red Baron ordered his men to jump and manuver through the river and chase off the last squad of eldar snipers. 3 of his men died when their packs failed to ignight and they were pulled under water by their own weight and lack of bouyancy. This left Da Red Baron and one man in his mob left, who got scared and was turning to run. That's when the Red Baron brought his choppa down upon the ork's head, killing him where he stood. "We don't run!" yelled the Red Baron, who than jumped up into the air and came crashing down into the middle of the five eldar snipers, killing 4 of them and chasing the 5th one away, who dove into the river for cover.
Photobucket

On the Eastern flank, The big mob of orks turned back onto the Dire Avengers. The loud "whoosh!" of rokkit packs told the Mek that the few remaining stormboyz with Chubby Chekkaz, their nob, would be joining in on the assault. The orks had called their Waaagh!, bringing more troops to the fight. Warboss Tirog Magogg watched on with delight as his mob slowly advanced Northward, seeing only a few of his units taking the fight to the Eldar. When the smoke cleared, there was only one Avenger left, who was running for his life.

(Eldar turn 4)
Not much left to do here. The lone Dire Avenger kept running away from the orks, but did manage to gun down 2 more orks before making his escape.
Photobucket
The Dragon Warriors on the West flank managed to finish off the last of the Killa kanz. The Falcon Grav tank tried to pump fire into the river, and take out The Red Baron. He wasn't seen rising from the river. (Rumor has it he survived and escaped).  The other Falcon Grav Tank tried to shoot as many ork warriors as it could but the damned Ork Force Field did it's job keeping orks alive.

(Ork Turn 5)
Finally, after getting lost, Orkold Schwarzenorker showed up with his Kommandos on the ridge to the East. Seeing no foes to fight, they just held their position and took it all in. It was an amazing scene of carnage laid to waste by their ork comrades.

The large ork mob with the Big Mek assaulted the Falcon Grav Tank by them and managed to prevent it from moving or shooting, stunning the crew with power klaws and grenades and choppas. The warboss just watched on as his troops killed off so many eldar.

The stormboyz left them and went after the other Grav Tank, in an effort to bring it crashing down, but failed to do such.
Also the Grots Of Doom closed into range on the Dragon Warriors. The Zzap guns continued their ineffective display of firepower. Either they were too underpowered to do any damage or they were charged strong and failed to hit anything.

(Eldar turn 5):
The lone Dire Avenger escaped the horde of orks, no doubt with tales of green horror to tell his superiors. The handful of Dragon Warriors, undaunted turned their guns to the stormboyz, but only managed to kill off one of them, and just couldn't stop the orks from ruining their day. The other Grav Tank was unable to do anything, suffering short circuits from the ork mob assault.

(((Game was called here on account of time to allow club play for more games even though a turn 6 was approved. This was quickly played out with dice to determine final results))).

(Ork Turn 6):
The combined mob of orks managed to jump on top of the Falcon Grav Tank, and the nob with the Power Klaw ripped it apart, causing the vehicle to become a wreck with over a dozen orks clambering over it and smashing it apart.
The stormboyz tried one last time between them and the Zzap guns to take out the other Grav Tank. It survived their attempts, and would go on to escape. It is very possible that grot shooting could have whittled down the Dragon Warriors.
Photobucket(Eldar Turn 6):
Dragon warriors and one Falcon grav tank are all that's left. Short of killing a squad of Gretchin (55 points), the warriors would clamber aboard their transport and flee to safety, perhaps one day to seek out revenge.
-----------------------------------------------------------------------------------------------------------------------------------------
Final results: Estimated: 1700 Victory Points scored by the Orks of Waaagh Karnage!
630 points scored by the Eldar, a solid Ork victory.

Wednesday, August 18, 2010

Battle Report: Space Marines vs. Orks

Space Marines vs. Orks:   Strike Force Steel Thunder vs. Blood Axe Mercenaries

Another encounter with the Blood Axes (Orks in training) with my friend Colin. He is still learning how to play orks, an army i've been playing for the past 4 years, and at times, competetively. So, as the Blood Axes are building a Shooty-Style Army of Ork Lootas, I allowed him access to my models and this gave me another chance to field my Space Marines, a new project I have been working on lately.
Our encounter takes us into the Asoria sub-sector, where the Blood Axes at this point, led by the boss Bullet-Bita, have been spearheading an assault into this region under orders from Ork Warlord Krogg Satogg of Krogg's Karnage.

Strike Force Steel Thunder is a unified force of Space Marines from two Chapters. The rebuilding Lamenters 5th Company allong with allies of the Salamanders 6th company. So far this list is still my 1000 point list from our local "Tale of 4 Gamers" in the Berks-PA Gaming Club. My list is pretty standard but has given me some fun options as I continue to complete painting them.

Space Marine Turn 1: Opening up fire into the battle, the Dreadnought Honorable Brother Val'Deez only managed to melt a tree in front of him with his multi-melta. The Whirlwind Hailfire scored a direct hit upon the orks wartrukk, but failed to damage it. All in all, a very ineffective round of shooting for the Space Marines.


Ork turn 1: Wartrukk with Nobs in it races down the Western flank. The Nobs crest the hill and are just barely in range of assaulting the Lamenter's Rhino. On the other side of the field, the Ork's looted wagon with battle cannon ( a looted Vindicator tank) scattered it's shot and it landed directly upon the Salamanders Rhino and a few scouts. The scouts avoided damage thanks to their camo cloaks. The advancing ork Ork Lootas and shoota boyz pumped some rokkit launchas into the Stunned Rhino and subsequently wrecked it, forcing the Salamander tactical squad to disembark.

Space Marine turn 2: The Landspeeder Storm arrived, outflanking from the East, allowing the Assault Scouts to come in behind the Looted Wagon. Shooting was more effective this turn, combined shooting scoring 3 wounds on the Nobs, (unsaved by Feel No Pain). Assault scouts with their transport pur their fire into the Looted Wagon, stunning it and than destroying it with Krak grenades and a melta-bomb from the Sgt. The Lamenters disembarked from their shaken transport, drew bolt pistols and than assaulted the Nobs. They scored 2 wounds, leaving just 3 Nobs left: the Pain-doc, one with a power claw and one other Nob.

Ork turn 2: More Outflanking! Ork Kommandos arrive on the South Eastern flank behind the Dreadnought and near the Whirlwind. The empty Wartrukk moved full speed ahead, attempting to tank-shock the Captain and his tactical 5-man squad. The Lamenters avoid the tank-shock and move aside. More orks advance, now in range of their shootas (18 inches) and start pouring dakka-dakka fire from their slug throwing guns into Space Marine units. They manage to kill 1 marine. Lootas fire their deffguns at the Assault scouts, who manage to avoid injury due to range and cover.


The Warboss calls a "Waaagh!", and rolls a 6 for the closest mob of boyz. They join in the fight with the Lamenters and Nobs and eventually the 5-man squad is finished off as the Warboss joins in the fun. Kommandos assault the dread, hoping to get the Nob with the Powerclaw leading the pack into the fight. He misses. Honorable Brother Val'Deez kills 2 Kommandos with his Dreadnought Close Combat Weapon.

\
Space Marine turn 3: As the Warboss and his troops are closing in, Ork teams fire into the squad of shoota boyz in the central objective area of the board. Combined fire takes out half the squad, killing 10 of the 20 orks. Other shooting stuns the Wartrukk. The Assault scouts Manuver around, trying to get an angle near the orks in the center of the battle field. The Battle of the Dreadnought and the Kommandos was still at a stand still.

Ork Turn 3: The Ork Wartrukk was attempting to ram the Whirlwind Hailfire, but it just didn't have enough speed. Still it pulled in close enough to get it's wrecking ball into range, but the deadly weapon missed. The Ork Warboss Bullet-Bita lead his mob closer to Captain Octavious. Their gunfire killed 3 of his Lamenters and the good Captain had the sense to pull his troops back (falling back 8 inches) and taking them out of assault range of the intruding Orks.

As shooting continued, the Salamander tactical squad lost 4 men, including the Sergeant, and they wisely pulled back. The Salamander Dreadnought, Honorable-Brother Val'Deez continued to hold his ground against the ork kommandos, killing another of their number.

Space Marine turn 4: This time the Marines concentrated their efforts on the weakened shoota boy mob in by the central objective towards the North. Shooting from the Landspeeder Storm, the Assault scouts and the surviving Salamanders combined to soften them up. A combined assault of the Scouts and Salamanders saw the orks get wiped out. Salamanders consolodated South, trying to block off the objective while the Assault Scouts claimed the objective.

Scout Snipers and the Whirlwind continued to pour fire into the closing mob of orks, killing a few more. The Dreadnought was still locked in a tied combat with the Kommandos.

Ork turn 4: Ork Lootas managed to shoot and kill one of the assault scouts, who were hunkered down in a copse of trees. The larger ork mob closes in on the Salamanders, shoots and than assaults them, killing a couple but loosing men in return.

The Dreadnought was still holding its ground, despite being shaken up a bit by the Nob with the Power Claw. The Wartrukk continued to try to hit the Whirlwind with its wrecking ball, but still managed to not hit the missle tank.

Space Marine turn 5: Captain Octavious stepped up and left Battle-Brother Heath Gulther, the last man of the 5-man combat squad still standing, who was just behind the Whirlwind and brought his Missle Launcher to bear. The Missle takes out the truck where it was sitting.

Where the Salamanders were tied up in an assault, the Sniper Scouts broke free from the ruined building and join into the assault. They managed to inflict some casualties and take a few of their own, but help hold the combat away from the other objectives.

The Landspeeder Storm zipped away flat out, moving into position to contest the objective where the 3 nobs were still camped out on the hill.

Ork turn 5: The Lootas managed to shoot down the Landspeeder Storm. They claim the Western objective. The large mob of boys finish off the lone Salamander and sniper scouts, and move to claim the southeast objective, but Captain Octavious is there to contest it. In the Center area of the field of battle, the Assault Scouts stand vicotrious on their objective, thus securing a 1-1 tie.

End Game: Objectives count: 1-1. Going to victory points is as follows: Orks: 549 points. Space Marines: 500. As this is in the 10% rule, (100 points in this case), the end result is a solid draw. The Lamenters and Salamanders of Strike Force Steel Thunder hold their ground, but fail to stop the Ork assault into the sector.


This was a very fun game. Colin is learning to play orks (my main army) and I'm helping him at what I call "Kamp Karnage" named after my own ork Army: Krogg's Karnage. His experimentation with a shooty style of ork army is starting to take off. I just heard that he defeated a cagey Space Wolf player recently. I look forward to more games with him as I help him join the WAAAGH!
I'm also enjoying learning how to run my Space Marines too, but I'm an Ork player at heart. :-)

Monday, August 2, 2010

Battle Report: Space Marines vs. Necrons

Strike Force Steel Thunder vs. Kalderian Tomb World (Necrons) [Mark VH]
1000 Points Annihilation. Deployment: Pitched Battle

+++REDACTED BY THE INQUISITION+++
On the planet of Greavalex in the Havaria Subsector, Captain Octavius Glabius, newly appointed to the Lamenters 5th company brought back another small scout force to investigate increased troop movements of reported greenskin incursions in the sector.

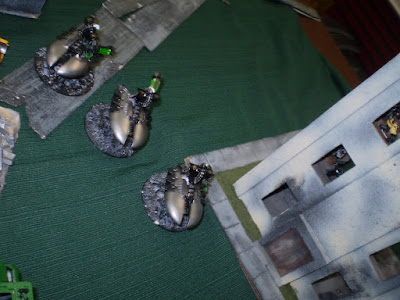
What they didn’t expect to find was yet another force. As they moved into the region of a torn and damaged industrial district, sensor readings indicated increased EMF emissions. +++REDACTED BY THE INQUISITION+++ These readings became evident as a large structure appeared, and from it, beings of steel death emerged from its eerie glowing green lights.
+++REDACTED BY THE INQUISITION+++
….Assembled his strike teams to counter this new threat. Captain Octavius Glabius ordered a scout strike team to outflank the new threat. As Sgt. Runat led his team around the Western flank, two tactical squads in Rhino transports prepared to engage the enemy forces. It was clearly evident that these new forces were not friendly.
Tactical squad Lamda consisting of Lamenters from the 5th company rolled North East. Tactical squad Epsilon consisting of a squad of Salamander Marines from the 6th company took position along the North West. The Salamander Whilwind “Hailfire” Took up position in the South East by Captain Octavius Glabius. Joining them was the Dreadnought, Honorable-Brother Va’Deez of the Salamander’s 6th company. In a 4 story ruined structure in the Southwest, Sgt Vidikas took a team of Lamenter scout snipers and a missle launcher into firing position.
Space Marine turn 1: Marines moved troops. Lamenters Rhino with Tactical squad Lamda rolled forth along the Eastern flank taking position behind a power converter structure. Honorable-Brother Val’Deez strode forward, hoping to bring his Multi-melta to bear upon the Monolithic structure that loomed before him. The white-hot rays from his weapon dissipated harmlessly around the pyramid-like machine.
Salamander Tactical squad moved north along the Western flank and the Rhino popped off its smoke launchers. Scout snipers gunned down a destroyer, only to see it repair itself with a “We’ll Be Back” (WBB) roll.
Necron Turn 1: Moving troops forward, the Necrons moved into position to fire at the Space Marines. As fate would have it, the large Monolith failed it’s dangerous terrain roll and got wedged between two of the structures as it was too big to move through the ruined buildings in the town square.
All necron weapons were stopped by cover and/or smoke launchers by the Space Marines. Scout snipers dug deep into cover, their camo-cloaks providing ample cover.
Space Marine turn 2: The Hailfire opened up with a massive salvo from its missle launchers, raining down pain on a collective group of Necron warriors. Out of 9 hits, all of them were either saved, or later regenerated by WBB rolls.

Much of the Space Marine fire was ineffective this turn, but Honorable-Brother Val’Deez rumbled through some rough terrain around a central structure and was able to bring his dreadnought close combat weapon to bear onto the immobile Monolith. He started to rip off some type of pintle mounted weaponry, weakening the structures attacks.
Necron turn 2: Concentrated fire from the Monolith and Necron warriors managed to stun the dreadnought and damage the leg-servos of Honorable-Brother Val’Deez. The remaining squad of Necron Warriors and Destroyers brought their weapons to bear upon the Salamander Rhino arriving on the Western flank. Eventually the vehicle was destroyed by heavy gauss fire, but tactical squad Epsilon managed to disembark their vehicle without any trouble.
Space Marine turn 3: This turn started to prove promising for the combined Lamenter and Salamander teams. Sgt. Runat and his assault scouts arrived on the West in their Land Speeder Storm. Laying down a heavy round of fire from the Heavy Bolter and their bolt pistols and the combined fire from the snipers and Salamander tactical squad, several Necron warriors were gunned down. Those units would then combine their efforts and assault the Necrons, hoping to see them off all together. Sgt Kal’Dey of the Salamanders scored a damaging hit upon the Necron lord with his powerfist.
On the Eastern flank, The Lamenter’s Rhino advanced under cover of smoke and unleashed tactical squad Lamda, who took their weapons to the Necrons. Honorable-Brother Val’Deez, his legs motionless, started to scale the side of the Necron Monolith, attempting to rip weaponry off as he made his ascent.
Necron turn 3: Seeing their forces being pulled down, the Necron troops recycled and stood back up, combining their attacks with their lord and eventually gunned down the Salamanders with combined fire from the Monolith and the Destroyers. This left Sgt Runat and just 2 men from his squad all alone facing a fully regenerated band of Necrons and a squad of 5 destroyers.

The Lamenters and Necrons were locked in a tough assault that kept seeing each squad whittle each other down.
Space Marine turn 4: Seeing the Necron warriors collected together, the Hailfire unleashed hell, blasting the entire squad with the Necron Lord and wounding 9 out of 11 of them with missle fire. The Necrons somehow managed to save 8 of the 9 wounds!

In an act of desperation, Sgt. Runat led his squad into a foolish assault and tried to hold the Necron Lord up long enough for help to arrive. It was a folly as they were cut down, but not before the Sgt took down one more Necron warrior with him.

The Lamenters were still engaged with the Necrons and Captain Octavius now embarked upon the Lamenter Rhino and moved forward hoping to either support his men or pull some of them back. As he did such, Honorable-Brother Val’Deez in his armored sarcophogas, continued to scale the side of the Monolith, pulling off more Necron weaponry as he climbed to the top where the crystal lay.
Necron turn 4: The Necrons continued to take the fight to the Space Marines. The Necron Lord used the power of the Monolith to pull his squad back through and they warped to the other side of the Monolith, bringing their troops to attack the Lamenters who were starting to win their fight with the other Necron squad.

The Destroyers took out the Land Speeder Storm, immobilizing it and now surged forward to engage targets of the sniper squad hunkered down in the tall building. So far, the Space Marines were down a 5-man squad of snipers, a Rhino, and a full tactical squad and now a Land Speeder Storm.
Space Marine turn 5: Realizing that this foe was not going to be able to be stopped, Captain Octavious had urged his driver to surge forward and get near the fallen men of Lamda squad . He was able to pull a few of them to safety, grievously wounded as they were, and attempt to escape the implacable foe.
The Whirlwind combined fire with the scouts and finally obliterated 2 of the destroyers. The Salamander Dreadnought, Honorable-Brother Val’Deez finally made his ascent and with his dreadnought close combat weapon, smashed the glowing green crystal atop the Necron Monlith, effectively wrecking it.
Necron turn 5: With the Space marine captain out of his Rhino and collecting men, The destroyers had turned their guns to the Rhino. They managed to wreck the Lamenter Rhino. With their great Monolith destroyed, the Necron squads finished off what was left of the Lamenters squad Lamda, and reacted negatively to their loss of the strange machine. The two squads engaged in the assault finished it off, taking down the last of Lamda squad.
End Game:
Game ended on turn 5. Going by the rule book (broken!), Necrons won this Annihilation mission 5-1. Going by Victory Points, they won 535-235. The unbelievable amount of armor and WBB saves that Mark made for his Necrons was nothing short of miraculous. He must have made 90% of his save rolls. I’ve never seen anything like it. In the end, I did get a moral victory with the destruction of the Monolith, as I’ve never wrecked one before , and this is only my 3rd time facing Necrons.

Post game fluff:
Captain Octavius was able to pull some of his men to safety. The destruction of the Monolith caused enough mayhem, disrupting enemy forces to allow him to gather some of his wounded men to safety. The Sniper team and Whirlwind provided covering fire. Sgt. Kal’Dey was dead, but thankfully with the distractions to the Necron forces, his body and most of his squad was able to be recovered for extraction of their progeniod glands. Some of his squad will survive their wounds.

+++REDACTED BY THE INQUISITION+++

The losses were high for the Space Marines, but the destruction of the Monlith was a moral victory. Reinforcements are on their way, as a new threat has appeared on Greavalxx in subsector: Havaria.