Berks Spring Assault 4!

Berks Spring Assault 4!
Berks Spring Assault 4! Warhammer 40K tournament

Berks Warhammer 40K Group

Wednesday, July 28, 2010

Old School Marines......The Star Dragons

The Star Dragons chapter of Space Marines is listed with very little info on the Lexicanum Online.     My good friend John has been playing Warhammer 40K since the days when it first came out as Rogue Trader.    Now weather this was a chapter that originally existed or was one that John grabbed the name of himself or read about, it doesn't really matter.
Photobucket
What does matter is that John has been running his Space Marines for at least 20 years.    He has some very original and older (vintage) models.    I've gone so far as to tease John about the age of his models and am in the process of making "classic license plates" tags for them, each bearing the name of the transport and/or tank.
Marine tank.
As the Space Marines and thier codex evolved, so too has John's play style and army, but the majority of his models have remained the same.    Now time is wearing on the army and they are in need of an upgrade and newer or at least a touched up paint scheme.
John currently is deployed in Kuwait with the Navy and the SeeBees.    During his departure, I was able to aquire an old original Mk1 Land Raider.    It took quite a while to seek this model out, but I finally found it.   I was saving it as a "welcoming home" gift for him, but since he's been actively seeking out more vintage rhinos and such, I had to let the cat out of the bag.

So, the Star Dragons will continue to remain an older, loyal chapter of Space Marines, much of their equipment will be older in vintage but just as effective as the newer marine players.    In fact, John is seeking out another "Thud Gun" to add to his other one, that serves as the Thunderfire Cannon in the newer Codex.  


What John has brought to our gaming club at Berks-PA Gaming is experience, knowledge, humor, mentorship, and sportsmanship.    John has mentored myself as well as others in tournament style play as well as heavily emphasised the "Army Fluff" and backgrounds and story writing into our hobby.       Matching the aspects of the Hobbies that Jervis Johnson wrote in White Dwarf this past year:  Collecting, Modeling/sculpting, Paitning, Competition, and Socialization, I can say that when I look at my "pie" it shows all aspects of the hobby in equal parts.   

Now as time and games have gone on, there is a HUGE rivalry between my Ork Warlord Krogg Satogg and his Captian Bruno.   This has only served to strengthen our friendship and generate even more smack-talk between us.
Photobucket
One nice thing about this hobby of Warhammer 40,000 is that even though Games Workshop comes out with newer stuff, at least most of your models will have some longevity, as evidenced by the Star Dragons, still taking the fight to the Galaxy for over 20 years!

Thursday, July 22, 2010

Works in Progress: Space Marines

Works in Progress:  Space Marines:

I have been working on some Space Marines now for a little while as my 3rd army for Warhammer 40K.    Recently in both the Berks Warhammer 40K club as well as the Adventurer's Guild, I entered a "Tale of 4 Gamers" type of challenge.   I had been making good work until life complicated things.

I had run a large tournament in April, the Berks Spring Assault.   I was ill prepared for nearly 40 players showing up and that event took a lot out of me.   Plus I was moving to a new house and that took time as well, so I had taken a break from painting and working on minatures.

Now, I have the creative bug back and have been feverishly working on completing at least the first 1000 points of this army.    Initially I wanted to create an army based on a Lesser Known chapter of Marines, since I like to keep things unique.     I eventually settled on Lamenters, as their background has been checkered with doom and they are in various states of rebuilding.

My 8 year old son, who is taking a huge liking to Warhammer 40K wanted me to build Salamanders.   Green is his favorite color and he liked how they were based upon dragons and preferred using flame weapons.    So, in lieu of building (and paying for) two armies, I decided to combine them.

So, my army fluff takes off from there the Lamenters were down to just 3 companies.   Now they are rebuilding, and my company will be the 5th company Lamenters.    Adding to that the 6th company of Salamanders aiding them in support and training.  

Now I have a combined force of Lamenters & Salamanders working together.   The Yellow and Green units look great along side each other.   Thus the combined project has been called:  STRIKE FORCE: STEEL THUNDER.

I'm working on more units, but here's some of my highlights of what I am finishing off:

Lamenter's Company Captain.    The checkerboard pattern around his cape has been tedious work but is really starting to look good.

Lamenter's Tactical squad:  The Yellow is a tough color to paint with, requiring mulitple coats.    The shoulder pads symbol, the Heart and Teardrop inside the checkerboard pattern is tough.   Good thing I spent 2 years painting a Goff ork army and mastering the Checkerboard patterns.


Salamanders tactical squad and Rhino are coming along nicely.   The Rhino, featuring Forge World doors is complete and took 3rd place in a painting competition at Hobby Town USA.

The sniper scouts look much better now that I finished the camo cloaks.   These photos do not show that, but they are coming along nicely.   I also have a completed 5-man squad of Assault scouts who will ride into battle on a Land Speeder Storm, that is currently still on sprue but mostly painted.

I hope to have these models finished by the end of July 2010.

Monday, July 19, 2010

False Hope Crusade Battle Report: Orks vs. Chaos Marines

A FALSE HOPE CRUSADE BATTLE REPORT:

Orks of Krogg's Karnage vs. the Slaneesh Chaos Marines of the Heartbreakers.
Mission: Pillage: Chaos Marines Mission 1 from Battle Missions Book
Objective: 5 Loot & Pillage markers would be placed as per a Seize Ground Mission. Scoring would start at the end of your opponent's turn. Chaos Marines scored 1 Loot point for each marker they were in BASE contact with (not in assaults or falling back). Orks would score one Salvage point for each marker they were in BASE contact with at the end of the game, not engaged in an assault or falling back. Scoring would take place EVERY turn.

Points: 1850 Deployment: modified Spearhead (Table Quarters, but only 1 HQ and up to 2 troops, all other units are in Reserves).             Fort Hungstun.

It was no secret that the Daemon Princess Jenna would be wanting to strike at such a "comically" named place. Looking for a good fight, Warlord Krogg Satogg took lead of a strike team to intercept the Chaos Marines, in an attempt to claim some much needed supplies, and take the fight to the Marines, so as to show them who truly owns supremacy in this sector.

Ork forces deployed as follows: 1850 points
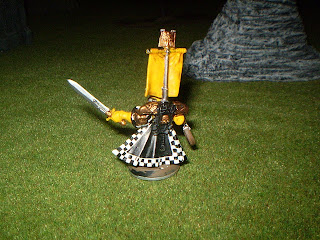
* Warboss with Mega Armor, bosspole, cybork body, ammo runt, kombi shoota-skorcha
* Big Mek with Kustom Force Field, and 'eavy armor

* 10 'ard boyz with Nob w/ big Choppa in wartrukk (Ork-Vee with Warboss riding inside)
* 11 'ard boyz with Nob w/power claw, bosspole, Kombi shoota-skorcha in wartrukk (big Mek riding inside)
* 20 shoota boyz with Nob w/ bosspole. 2 rokkit launchas
* 27 ork boyz (slugga boyz), 2/ 2 x Big shootas, Nob w/'eavy armor, powerclaw, bosspole
* 15 Gretchin & runtherder

* 20 x Stormboyz (red storm): Nob: 'eavy armor, bosspole, big choppa
* 20 x Stormboyz (white storm): Nob: 'eavy armor, bosspole, power claw

* 5 x tankbustas, 2 bomb squigs, 1 tankhammer
* 3 x Killa kanz mob (big shoota, rokkit launcha, grotzooka)
* Big gunz: 3 x Zzap guns, +3 extra crew, runtherder
---------------------------------------------------------------------------------
Prior to both parties deploying their forces, both the orks and the Chaos Marines had the idea of ome orbital bombardment. No matter what happened, it seemed that both forces were intent upon causing as much mayhem and destruction to the local populace. It was simply a matter of who was going to collect the most prizes after the long-range destruction was complete. Chaos Marines deployed in their landers and gunships. Both forces had located a 'hot-spot" of technology and components around what now was a pulverized fortress, an outpost in the wilderness with a couple of support buildings. Between the heavy bombardment of lascannon fire from the marines and meteoric rock drops from the orks, not much was left intact.
The Hearbreakers arrived from the Northeast quadrant of the battlefield. A unit of Noise Marines set up a defensive position in a ruined structure that also was the location of an important objecive marker. Daemon Princess Jenna leaped forward, her wings carrying her close to the central fortress now a ruined pile that still housed critical military components. Along the Eastern front, a large unit of traitorous marines tainted by Nurgle, led by what appeared to be a festered ork boss in Marine colors led the bunch.

The battlefield had the fort located in the center with one loot objective. On the Eastern side (My right), one was in a ruined building in the south east, and one in a building in the North East. On the Western flank one objective was centrally located not in cover at all. to the North West, amid a cluster of rocky buttes lay another.
On the South West quadrant, An ork wartrukk with the Big Mek and 11 'ard boyz positioned by the SW objective. The mob of 20 shoota boyz joined them as well, just behind, hoping to stay out of range of the Chaos weapons to start the game.
Chaos Turn 1: the Heartbreakers concentrated on movement and positioning to start the match. Daemon Princess Jenna leaped towards the central objective in the ruined fort. The Nurgle troops marched south along the Eastern front, almost tripping over their own feet in their pathetic attempt at running. The Blast Master with the Noise Marines fired a salvo toward the orks. They were mostly out of range, and between his and Jenna's attempts, the Ork Force Field held strong. Orks were in possession of 1 Salvage counter at the end of the turn.
Ork turn 1: Seeing their main target moving close, the shoota boyz urged forward hoping to close distance with Jenna. Only 4 of them got into range, 2 armed with shootas and 2 armed with WPG (Waaagh Propelled Grenade) Rokkit Launchas. Their shots would strike true, hitting 4 out of 6 times, causing 2 wounds to the Daemon Princess. The trukk moved closer to the NW objective, deploying the 'ard boyz who ran into the cover of the rocky buttes, trying to close in on the NW objective. The shoota boyz kept the tail end of their mob in contact with the SW Objective. Chaos Marines scored 2 Loot counters.
Chaos Turn 2: Dice gods were with the Heartbreakers, who made a whopping 4 reserve rolls! A predator tank, another squad of Noise Marines, a Rhino with Havoc Launcher and Beserkers on board, and a defiler (that looked like a converted soulgrinder) all rumbled into view. They manuvered to get a better line on the orks. The Nurgle marines continued to move (slowly) south on the Eastern front. The predator fired a lascannon shot into the wartrukk, but the Big Mek's custom force field kept it and most of the ork warriors safe from enemy fire.

Daemon Princess Jenna moved out of the ruined structure and attempted to use her "Lash of Slaneesh" to pull the shoota boyz mob closer to her (Eric rolled snake eyes). Still, it was just enough to get the Princess in range to assault the orks. She managed to kill 4 of the orks, but the orks were too numerous and hungry for battle and pulled the Daemon Princess down. Weather Jenna was cut down or chose that time to teleport away the orks did not know, nor care, as she was gone from the battle and they were free to go kill some more.
Orks were in posession of 2 Salvage Markers: Score: orks 3, Chaos: 2

Ork turn 2: The orks didn't do near as well as the Chaos marines on reserve rolls, but 3 units did arrive. The Killa Kanz mob arrived in the south west, looking to possibly make their way east towards the Nurgle marines. The Red Storm mob of Stormboyz led by Da Red Baron arrived, dropping in from high above. Coming in off an overhead 'Chinork' Warcopta, the Stormboyz landed (deep strike) around the central ruined fortress. With the Daemon Princess gone, the stormboyz were free to run and secure their position inside the structure, positioning themselves for cover.
Warlord Krogg Satogg arrived upon his Ork-Vee wartrukk. His band of 'ard boyz rolled forth securing the SW objective, allowing the shoota boyz to move forward and attempt to shoot rokkits into the chaos rhino, but to no avail. The other 'ard boyz with the Big Mek moved to secure the NW objective and the Big Mek tried to keep his Kustom Force Field around centralized to protect as many of his companions as possible.

Heartbreakers were still in posession of 2 Loot counters: Score: orks:3, Chaos :4
Chaos turn 3: More troops by the Heartbreakers arrive. A pair of Obliterators (Ron & John) deep struck right infront of the Killa Kanz. The grot pilots screamed in terror as the Obliterators appendages morphed into Melta guns. Their surprise attack destroyed 2 of the kanz, incinerating them into piles of twisted wreckage. The Beserkers on the North central part of the battlefield disembarked from their transport and lunged forward in hopes to assault the 'ard boyz inside the cover of the rocky buttes. Needed a 3 or 4 to make the assault, the Beserkers rolled a 1 and a 2 for their difficult terrain roll, falling short and unable to assault the ork warriors.
The Nurgle Marines finally made it to the South East objective and took up a position inside the ruined building. The Predator fired again into the ork wartrukks, only to see it's shot fizzle as it impacted the Big Mek's force field once again. The remaining orks fired all of their shots into the Red Stormboyz mob central in the ruins. The orks made excellent use of cover, only losing 3 of their 20-man strong unit to incoming fire. Things were looking very grim for the Heartbreakers this turn.

Krogg's Karnage was in possession of 3 Salvage counters: Score: Orks 6, Chaos 4
Orks turn 3: More ork reserves arrived this turn. A large mob of boyz (Alfa Skwad) led by ork nob "Gunzor" came into the field right by the wrecked killa kanz and where the obliterators stood. The orks pumped slugga fire into them, gunning one of the twisted walkers down. The Lone Killa kan marched Eastward, hoping to get into battle with the Nurgle Plague marines. Along with the large mob of orks, the gretchin mobs arrived, both the foot-sloggers and the Zzap guns crews. The Tankbustas also arrived, but were too far out of range to shoot any chaos vehicles yet.

The 'ard boyz to the NW moved and assaulted the Berskers, killed 3 of them, but took heavier casualties and in the end were run down by the awaiting chaos marines. The Stormboyz in the center of the ruins chose to abandon their post and leap forward. Their blitz attack saw the Squad of Noise Marines in the central North cut down to a man, the Orks than scrambling into the nearby woods to grab onto more cover.
The Shoota boyz moved to shoot the Rhino to the North West again and failed. Warlord Krogg and his men held their position, waiting for a foe to attack, moving their trukk into better position.

Chaos Marines were still in posession of 2 Loot counters: Score: orks: 6, chaos: 6

Chaos turn 4: Persitency is sometimes rewarded and this time the Predator tank found a seam in the ork force field and took out the engine to the Warboss's Ork-Vee. Despite the ramshackle construction of the vehicle, it simply just shut down, the motor ruined, but nothing else. Warlord Krogg Satogg ordered his orks to bail out and prepare to embark into the Big Mek's trukk that was right next to theirs.
The Beserkers left the Big Mek to the fire power of the Havoc launcher equipped Rhino. Theu instead charged around the rocky buttes and took out the remaining shoota boyz.

The Big Mek had secured the NW objective as the 'ard boyz ran to assault the Beserkers. He was not prepared for the 'ard boyz to be wiped out so quickly and than found himself falling to enemy fire despite the power of his Kustom Force Field. The Nurgle Marines held their position in the SE. Noise marines kept pouring fire into advancing ork hordes. The chaos marines in the 2nd Rhino with Havoc Launcher deployed and fired 4 flamethrowers into the woods, burning out the stormboyz. Concentrated fire gunned down a dozen of the greenskins, leaving just The Red Baron himself, the Stormboyz Nob, smoking and charred, but unhurt. The Defiler closed into the center ruins, trying to get position on the central objective.

Orks were in possession of just 1 Salvage counter: Score: orks: 7, Chaos: 6

Ork turn 4: Orks moved again, the White Stormboyz led by Nob "Chubby Chekkaz" arriving and moving East and south to seek out the Nurgle marines. They would fire their sluggas into the building harmlessly and than assault the troops inside. Chubby Chekkaz missed with his powerclaw, but the troops were still numeroius enough to hold their ground. The large mob of orks made their way towards the central objective, calling out a Waaagh! The shoota boyz moved to get position on the Beserkers and fired a hail of gunfire their way. The Killa kan managed to finally hurt one of the Nurgle troops with the Grotzooka (they had made their "Feel No Pain" rolls all game long....).

The shoota boyz were wiped out, but the Beserkers were just in range for Warlord Krogg to lead the attack. His large mob fell short in the difficult terrain to join into the fray. The Ork warlord would prove to be too much for even Khorne Beserkers and would cut them down to a man with his mob of 'ard boyz alongside of him.
On the North East, The Red Baron ignighted his jump pack and landed behind the Rhino armed with the Havoc Launcher. With a series of well placed blows from his Big Choppa exploded the fuel tank and caused the machine to explode in a cloud of shrapnel. The Red Baron smiled in his efforts.

Chaos Marines were in possession of 1 Loot objective: Score: Orks: 6, Chaos: 7.

Chaos turn 5: The Chaos marines continued to fight, the tactical squad that was heading West now turned their attention back East due to the carnage caused by The Red Baron. They would concentrate their fire into him with the Noise Marines on the East and cause a flare up into his Rokkit Pack, and the Red Baron's pack exploded in a plume and trail of black smoke sending the nob high into the sky and off to the North, never to be seen the rest of the battle.

The Defiler/soulgrinder was secured on the middle objective, fired it's battle cannon harmlessly between all ork units.

The Nurgle troops pulled down the last of the Stormboyz from the white mob, their feel-no-pain ability keeping them mostly intact, only losing 2 troops. Chubby Chekkas threw his boyz into hsi path, igniting his rokkit pack and making his escape before he got pulled down with the rest of his mob. The Nurgle Marines pulled back to consolidate by the SE objective again.8
Orks were in possession of 1 Salvage Objective, score: Orks : 7, Chaos 7.

Orks turn 5: Trying to cut down the marines and even the score the orks of Kroggs' Karnage struck out. Combined efforts of the Tankbustas unleashing a bomb squig and fire from the Zzap guns caused damage to the defiler, taking out a claw, it's battlecannon and immoblizing it by crippling one of it's legs. Still, the large machine sat securely upon the central objective.
The large mob of ork boyz had moved into the ruined keep, looking to at least deny the Defiler the ability to score points on the central objective in the ruined fort.

The lone killa kan tried to closed on the Nurgle marines, killed one more with it's Grotzooka, but was just outside of range to assault them insde the building. The lone ork wartrukk kept moving around, lending it's big shoota into firing into any enemy it could find. Warlord Krogg Satogg ran forth and once again with his 'ard boyz and secured the NW objective.

Heartbreakers were back in possession of 2 Loot markers,: Score: orks 7, Chaos: 9.
Chaos Turn 6: The battle was far from over and the Marines had to find a way to finish the horde of orks off. The rhino with Havoc Launcher left in the NW drew a bead on the Ork Warlord, but falied to target him within the rocky confines of the buttes. The defiler in the central ruins was still engaged with the orks, and the Nob with is powerclaw was able to pile in. Despite losing a couple of orks, the Nob Gunzor, tore the Defiler in half, ripping the top part from the lower and left its remains clatter down the side of the fortress. Orks consolidated closer south east towards the Nurgle troops, but still in possession of the central objective.

The Nurgle marines blasted the lone killa kan with a pair of Melta guns, causing the grot-powerd device to explode in a cloud of fire and shrapnel. Orks loomed in the middle of the battle field, this battle was far from over.
The Grots of Doom held the SW objective. Orks in possession scoring 3 Salvage markers: Score: Orks: 10, Chaos: 9

Ork turn 6: Doing their best to secure this game, the orks tried to take out as many Marines as they could. In the Northwest, the remaining 'ard boyz of Krogg's truck mob took over holding his objective. Warlord Krogg rumbed forth and sunk his powerclaw into the chaos Rhino, tearing the machine apart into shreds of scrap metal.
The Grots of Doom held onto their objective in the South West. Zzap gun crews tried to shoot at the nugle Marines in the south East, and the Tankbustas kept running forth, shooting some rokkits into the direction of the Predator tank.

The lone wartrukk and crew raced their vehicle into the ruined fortress and positioned themselves to keep the central objective while Gunzor led his mob down the bluff and south east to confront the Nurgle troops. The orks were in possession of 3 objectives, but needed this game to go another turn to have a chance at a win.
One last chance to pull victory from the marines: Nob Gunzor and his band of orks, still over 20 strong, had to assault the Nurgle Marines to the SE, keeping them from being able to score at the end of the turn. They were 3 1/2 inches away and needed a 4+. The dice roll was a 3! The orks failed to assault the Nurgle troops.

Heartbreakers (barely) in possession of 2 loot counters. Score: Orks: 10, Chaos: 11
----------------------------------------------------------------------------------------------------------
The Game ended on turn 6. In a standard Seize Ground mission, this would have been an Ork victory. But it wasn't. This was a battle missions game. This was an INCREDIBLE fight and a very enjoyable game. I can look back and second guess myself on some things. Should I have kept the Red Stormboyz in the central objective one more time and risked another round of fire? Good chance the Defiler could have closed the distance to assault them had I not moved them. The Beserkers failing their first assault was matched by my own orks failing their difficult ground move for the final assault, which would have resulted in a 10-10 tie. Victory points wise this was a close battle, but was in favor of the orks, no doubt there.

As for Eric Bates, he now gains the honor of one of the few Berks 40K club members to pull a victory off on me. This game was so fun and Eric is such a great opponent to play. He knows his army, his fluff is fun, and he's just a fun guy to play against. I look forward to a rematch with him again sometime. As for the rest of you.......I suggest you try this mission out, it was Extremely fun and changed tactics from the standard Seize ground style, since you can score points every turn.
---------------------------------------------------------------------------------------------
In the aftermath of the battle, Warlord Krogg took out the Chaos Rhino. It had seemed as though the dark marines had slithered away under the cover of smoke from the battlefield. While the Heartbreakers made off with the better parts of the choice loot, the orks could rest assured that they had a good fight and collected a substantial amount of wargear themselves. Their leader was taken out and to Warlord Krogg Satogg, that in and of itself was a victory. The Big Mek appeared, injured but not dead. Krogg was surprised, but the Mek's addition to his warband no doubt was a good one. They made their way back into their wartrukk, using cables and ropes to tow the second trukk back to the ork camp.

The orks loaded up their equipment. "We are not done fightin' here..." the ork warlord proclaimed. ".....we will go through our loot and than plan another raid!"
A cheer went up from the surviving orks of the battle, still well over half the warband was intact. Now it was time to collect equipment rebuild and plan for another fight.

Thursday, July 15, 2010

We have a winner!

Applications for my Super Blog Chain Give Away has closed and I have selected a winner!

I had some good ideas suggested, but in the end, I had to go with the comment that had the most originality and made me laugh.     So, that honor goes to Gonewild!

He wins a Razorback for Squad B, so now they don't have to be left behind as opposed to A-squad.  

Thank you so much everyone who entered.   Be sure to check out Santa Cruz Warhammer and follow the Super Blog Chain Give Away.  There are three of them running and if you didn't win this time, just keep following the Give Away and keep trying.   

Also be sure to follow the blogs of the folks holding them as I am theirs and hopefully you all lniked to me and follow my blog as well.

Thanks again, and as for Gonewild.....  contact me and we will make arrangements to get your Razorback out to you!

Tuesday, July 13, 2010

False Hope Crusade......Task Force Archer Enroute!

False Hope Crusade:  A message from the forces of Task Force Archer  (By John Tinney, who is away in Kuwait with the U.S. Navy and the Seabees serving our country).

Oh goody.... First a bit of fluff for reading then the registration...
News occasionally travels fast in the Warp…

Around a fire pit near a grounded Thunderhawk, the small band of wild haired Marines raised flagons of ale as their leader stood upon a rock, the bloody severed head of a sabertoothed tiger in his grasp. “WE FLY!! WE FLY TO THE SECTOR OF FALSE HOPE….” He bellowed and tossed the head to another marine in the gathering. “… WHERE MORE GLORY AWAITS BEOWULF AND THE SHADOW MASTIFFS
Cries of “Beowulf” were heard from the drinking men as Beowuif leapt from his rock and stalked around the fire pit.
“WE SHALL BRING DEATH TO TRAITORS”
“WE BRING LIGHT TO THE DARK”
“WE BRING GLORY TO THE CHAPTER AND TO THE EMPEROR”

Each statement brought a wordless yell from the men and only seemed to wind up the speaker more
“LET NONE STAND IN OUR WAY. I AM BEOWULF AND THIS I COMMAND!!!”

Off to the side, two Marines stood and watched. The older of the two fingered the small imperial cross buried among the talismans on his chest. “Impetuous fool…”

The other snorted. “We all were at one time, Magnus. He is young and has the favor of Crom…”
A small flotilla floated in space around a verdant world, shuttles transiting between them and the ground below. In an observation bubble, a man in flowing robes watched the shipping and sighed as he glanced at a wrist chrono.
“Your Grace,” A silky toned female voice said as the door to the bubble opened. “About another three hours and the fleet will be prepared for movement.”

“Very Good Cannoness…” Was his reply. A long period of silence followed then he continued. “Were that our service was truly done, Leslie Anne… but heresy does not stay away long does it?”

She came up beside the man and stared out along side of him. “No… the whispers never cease to speak and those without the will shall always succumb. Especially when there is no guidance. The False Hope has not had any for some time… You know this, Inquisitor.”

“I do… and it pains me to see that some of MY own are behind this lack of faith in the Emperor and loyalty to the Imperium.”

A smile and the Cannoness slipped her arm inside of his “Then your Grace, we shall have to correct their lack of faith and loyalty, won’t we?”

A matching smile. “That we shall, My Dear… that we shall…”

*******************************************************************************
Photobucket
Commander Bruno stalked the main Conference Room of the Dragon’s Fire awaiting the arrival of his Master. The headstrong captain seethed at the delay in deployment to False Hope… knowing his nemesis Krogg would be there wreaking havoc on Loyalist forces…. Forces he knew to be un-experienced at best against the Xeno Warlord.
Star Dragon Space Marines
Hearing the door open, he glanced up to see the lead member of the Master’s Honor Guard, the former Adepta Soroitas’ raven black hair cut short and the gold bolt pistol of her personal arms attached to her leg rig. “Battle-Master Nathanial bids you join him in Sim Room Four, Commander.”

Coming to attention, Bruno saluted the Senior Centurian. “Of Course Centurian.” He answered and made his way out of the conference room with a mind full of Questions. He knew the Master never went far without the Honor Guard and the precense of a female member would be enough to cause fits among some of the brother Chapters (the Ultramarines having the biggest issue, the arrogant pricks) but it was rare to see them away from him or without their helms.
It was these thoughts that accompanied him into Holosim Room Four and the Presence of Master Garro and his Council.
Photobucket
***********************************************************************************
Ok then.
Registering the following armies as Forces of Order:

Star Dragons as led by Battle Master Garro Nathaniel (Bruno's Boss)

Order of the Steadfast Heart in service to Arch Inquisitor Kensai of the Ordo Hereticus (He has decided he sat on the sidelines too long)

Shadow Mastiffs as led by Battle Leader Beowulf (upstart space wolf with delusions of something...)

ETA to False Hope Sector is roughly 140 days untill arrival in theater.

Final day of entry for the Blog Give Away

This is the final day of my Super Blog Chain Give Away!   Over the next two days I will consider the comments listed below and select a winner and award the prize.    I look forward to seeing this chain continue and find out who will win next!

Good luck and thank you to all who have responded!   This is such a fun idea!

Follow the link below to my SUPER BLOG CHAIN GIVE AWAY

Sunday, July 11, 2010

Summer Camp, 40K style.

WANT TO GO TO SUMMER CAMP? WHY NOT TRY KAMP KARNAGE?

 
WHERE ALL THE KOOL KIDS KOME TO LEARN HOW TO WAGE WAR LIKE A TRUE ORK WARBOSS!

KAMP KARNAGE OFFERS THE FOLLOWING:

• IN DEPTH ORKY TAK-TIKS AND BATTLE PLANZ FROM AKTUAL ORK WARRIORS
• INSTRUKSHUN IN HOW TO BUILD A MOB
• WHEN AND HOW TO WAAAGH! PROPERLY
• SQUIG FEEDING FARM
• BIG SHOOTA SHOOTIN’ RANGE
• MEET AND GREET WITH TOP NOBZ AND WARBOSSES
• SQUIGGOTH RIDES
• WARBUGGY RACE TRAK
• KICK DA GROT COMPETITION
• PIN DA POWERCLAW ON DA DEFF DREAD
• SHOKK ATTACK GUN DISPLAY
• MEET DA RED BARON AN’ DA FLYIN’ CIRCUMSTANCES, STORMBOYZ OF FAME.
• SWIM IN LAKE GHAZKULL

YES INDEED, KAMP KARNAGE IZ DA PLACE TO BE DIS SUMMUR. LEARN HOW TO FIGHT LIKE AN ORK AND JOIN WAAAGH! KROGG AS WARLORD KROGG SATOGG BUILDS UP HIS WARBAND TO LAUNCH AN ALL NEW BATTLE STRIKE INTO THE FALSE HOPE SECTOR LATER THIS SUMMER OR FALL.


JUST REMEMBER, WE DON’T RUN WHEN WE CAN WAAAGH!

Wednesday, July 7, 2010

Prize Give Away!


Hey all, don't forget that I am running the Super Blog Chain Give Away, started by Santa Cruz Warhammer. Check out the link and post a comment and follow the rules!


I'm giving away good stuff! If you win, pay it back and pass it along!

Sunday, July 4, 2010

Battle Report: Imperial Guard vs. Tau

Warhammer 40,000 Battle Report: Imperial Guard vs. Tau

Cadian 17th vs. Tau: E’co Sept (Jon Kissinger)
Mission: Pillars of Hatred, round 5: The Pillars
Deployment: Modified Pitched Battle*

This was the 5th episode of the Pillars of Hatred campaign for the Cadian 17th, who were lured to the dark planet of Bein-Telu by the Renegade Inquisitor, Lord Aki. Dark things lurk on this foul planet, once home to an industrious civilization. Dark forces of Chaos linger in the planet in forms of Pillars that caused the planetary population to turn on each other and hold a civil war.

Lured by the promise of power, Lord Aki was not alone in his ventures, only the first to make planet fall. Having discovered the arriving forces also drawn by either a distress beacon or the call of chaos, he set his plans into motion.

First, the initial recon forces of the Cadian 17th expeditionary forces were lured to a landing zone by Lord Aki. As troops made planet fall, Inquisitor Lord Aki sprung his trap, attacking the loyal imperial force, and catching them by surprise.
Colonel Colwyn Dray, company HQ of the Cadian 17th Recon division pulled his forces back and waited for reinforcements to arrive as he tried to ascertain what had just transpired in this ploy of treachery. Identifying five other forces than his own on Bein-Telu, it was decided to attempt to make a run for the call to the Pillars that manifested their call of power in the form of dreams and nightmares into the command staff of the Cadian 17th.

During the campaign, they had been ambushed by Inquisitor Lord Aki, and than beset upon by Traitorous forces of Chaos by the Army of the Ten Rings. As a few units made the breakthrough, this led to the disturbing event of Salamander space marines losing forces to chaos. After combining efforts with the Salamanders 2nd company in stopping their cursed brothers, Colonel Dray was than sent to capture the mysterious “Keepers” before the Tau of force Firestorm could.

Escaping with 2 of the Keepers, the secrets garnered from them led to this stage of battle now….the location of the Pillars of Hatred. It would be up to the Cadian 17th to intercept Commander Shas’o Ra’Kel and the E’co Sept Tau forces from controlling or destroying the Pillar of Hatred.

The Pillars of Hatred. The dark source could be either controlled or destroyed. It finally came to come, it was time to end this problem. Colonel Dray discussed with his staff, and they decided they would intercept the Tau forces of E’co Sept. They would attempt to control the Pillar, and failing that, destroy it with multiple melta gun shots.

Commissar Blackledge was to lead the way to glory, taking lead of 1st infantry platoon, combining Alpha, Bravo, and Charlie squads and securing the Pillar. If the Tau forces got too close, his plan was to destroy the Pillar. Success in this mission would lead him to advancement and promotion to Lord Commissar. Colonel Dray would oversee support operations with a Leman Russ Battle Tank, a Demolisher Tank, and heavy weapons team. Veteran squad 17 would attempt to cut off enemy forces arriving via a Valkyrie Assault Carrier, and Lt. James Gavin would take the 005th Stormtrooper unit in Recon and outflank the enemy, striking them where they least expected it.

The tactics were good. The plan was sound. It started to work. Than all hell broke loose and the Pillars of Hatred unleashed their Chaotic Hell upon everyone……..

Taking to the field, the Pillar of Hatred stood in its lonesome, surrounded by nothing but craters and debris. Around the pillar were some ruined buildings and scattered woods.

Cadian 17th forces (1500 points consisted of the following):
HQ: Company Command, senior officer w/power weapon, 1 Regimental standard, 3 sniper rifles, Master of Ordnance, entire squad with carapace armor

Troops: Infantry Platoon: command: junior officer with power fist, 2 x melta guns, 1 medi-pack, 1 vox caster
• Infantry squad: vox caster, Melta gun. Commissar (plasma pistol & power weapon)
• Infantry squad: Melta gun.
• Infantry squad: melta gun.
• Heavy weapons team: 2 x Lascannons, 1 Missle Launcher
• Veteran squad: Sgt w/plasma pistol, 3 x plasma guns, (riding in valkyrie)
Elites:
• Guardsman Dutch (SPC Marbo clone)
• Stormtroopers squad (10), Sgt w/power weapon, Plasma gun, Melta gun (Recon)
Fast attack: Valkyrie Assault Carrier (Lascannon, 2 x missles)
Heavy Support:
• Leman Russ Demolisher: w/lascannon upgrade
• Leman Russ Battletank: w/lascannon, sponson heavy bolters, HK missle, pintle mounted Heavy Stubber.

Points would be scored as follows:
• Control the Pillar at least 1 turn (by being in base contact with it for 2 consecutive turns), 15 points
• Destroy the Pillar of Hatred (AV14, 2 structure points), 10 points
• Kill enemy commander: 1 point
• Victory Points: Killed: total points/10, modified. Max total: 15 points.


Cadian turn 1: The warp storms were in effect, blinding light causing the same effect as “night fight” rules. The Valkyrie used its scout move to fly flat out and position itself along the right flank. Moving to hit the Hammerhead tank on the side, the Valkyrie moved slightly to fire a krak missle and lascannon, stunning the Tau vessel. Tau units moved as well, Two Devilfish transports came zooming right in to the center by the pillar. (scout moves) and deployed their infantry squads. The Leman Russ battle tank fired and took out two of its weapon systems. The Pillar fired off blue electric beams into each squad, not causing any casualties as of yet.

Commissar Blackledge moved his mob of 30 men from three combined infantry squads forward, urged further along with the aid of Lt. Balken and his infantry squad.

Tau turn 1: The Pillar continued to fire off bolts of energy around. Two troopers from the Cadian 1st platoon fell, but so too did three of the tau warriors. Devilfish moved forward, all Tau that could “see” Cadian forces trying to shoot the large squad, but most attempts failing to find their mark.

Cadian turn 2: With a brief lapse in the warp storm, total confusion set forth as the mystical energies of the Pillars of Hatred caused brother to turn on brother and each allied squad turned and opened fire into their closest ally.

On the Tau side, the Command unit in Crisis battle suits opened fire and annihilated a squad of tau pathfinders closest to the Pillar. Fire warriors immobilized their own transport tank, and another devilfish tank killed two of the fire warriors.

On the Cadian side, Lt. Balken’s squad turned their fire into 1st platoon, and the 25+ strong man unit returned fire. The ensuing lightshow of lasgun fire cut down all of the Infantry command squad except one lone Melta gunner, Corporal Miggins.
Trying to recover from what just happened, Commissar Blackledge restored order to his men and led them into an assault against the Pillar of Hatred. This would be 1 round of attempting to control the Pillar. All they needed to do was hold out one more turn, a Stubborn unit 25 strong and gaining a 4+ invulnerable save from any attacks coming from the Pillar itself (***thanks to not taking any chaos upgrades during the course of the campaign).
The Demolisher, Leman Russ Battle Tank and the timely arrival of Guardsman Dutch combined their fire into the command mass of the Tau battle suits. The shield drones did an amazing job of soaking up wounds.

The Valkyrie continued to fire into the Hammerhead on the right flank and stunned it yet again. The veteran squad from the Valkyrie deployed, pumping multiple plasma gun fire into the rear of another Devilfish, causing some minor damage.

Tau turn 2: The Pillar of Hatred still continued to cause mayhem and this time warped and teleported each and every unit within 18 inches of it (180 meters?). The Tau forces scattered harmlessly and not very far, basically falling back an average of about 7 inches.

The Cadian forces didn’t fare as well. 1st Platoon, along with Commissar Blackledge, were teleported back and right in front of the large squad of Tau Crisis suits and right out in the open, amid some craters.

The Leman Russ demolisher scattered into a woods and was lost in the warp. Guardsman Dutch also warped. In the Tau shooting phase, burst cannons from the other Hammerhead tank and a devilfish fired at him, but somehow the specialist managed to survive by hugging the ground and diving for cover (suffering 1 wound, going to ground, 6+ cover save, and stealth, giving him a 5+ cover save).
The Tau command squad fired all it had into Cadian 1st platoon, causing many casualties and weakening the Commissar’s unit considerably. The other Tau devilfish with weapons weakened flew back to the far left (west), positioning itself for a flying ramming attack next round.

Cadian turn 3: Warp storms again caused confusion, blinding forces from seeing too far. This greatly hampered the Cadian command with the Master of Ordnance as well as the heavy weapons squad nearby.

The Valkyrie positioned to the rear of the Hammerhead on the right flank, still trying to break its rear armor, only having a lascannon left to fire. The veteran squad from the Valkyrie moved up and pumped 7 plasma gun bursts into the rear of the other Devilfish, six hitting it square. They would manage to destroy it, leaving the fire warriors exposed.

Commissar Blackledge again led his men back into assault, this time firing melta guns into the Pillar to no effect, and than attempting to re-establish control once again.
The lone melta gunner, Corporal Miggins stepped up as well, firing a blast into the Pillar and then himself clinging to the side of the Pillar as well.

Tau turn 3: The Pillar was unable to shoot this round, but it didn’t matter. The Hammerhead on the Eastern flank gunned down all but one man from the Veteran squad, who dove for cover by some rocky outcroppings.

The Tau command squad along with combined fire from the other units managed to wipe out Commissar Blackledge and his unit. The Fire warriors gunned down Coproral Miggins. With no opposition nearby, the Tau commander SHAS'O RA'KEL led his band of battle suits and established contact with the Pillar of Hatred.

Cadian turn 4: Warp storms again firing around, the Pillar was unleashing large blasts into Tau forces. A few more shield drones were blown apart and a couple of the body guard crisis battle suits.

Guardsman Dutch ran for cover, trying to find a place to get position to help out. But he fell short of grabbing some serious cover in the rocky butte.

The stormtroopers arrived and fired Melta and Plasma gun into the rear of the Devilfish that flew off to the Western flank. Due to the speed of the transport, a killing blow from the melta gun barely missing. (Cover save from skimmer going flat out).

Combined fire from the Leman Russ battle tank and supporting units tried to whittle down the Tau command unit and prevent them from controlling the Pillar of Hatred. The unit survived with Commander SHAS'O RA'KEL and 2 of his body guard still alive, but injured.

The Valkyrie in the North East finally did some damage, and immobilized the Hammerhead and eventually took out its main gun as well.

Tau turn 4: The Hammerhead on the North west opened fire and gunned down Guardsman Dutch (or chased him into cover so deep, he was never coming back out this battle). The other Hammerhead, damaged now, tried to finish off the lone veteran warrior with its burst cannon, but failed to eliminate him.

The Tau Commander finally succeeded. Two full turns (consecutive assault phases) in base contact with the Pillar of Hatred, and established control.

Cadian turn 5: Time running out, and little in the way of options, the Cadian forces fired all they could into the commanding Tau unit. Leman Russ Battle tank cutting down the last 2 warriors and injuring the Tau Commander.

The Master of Ordnance called in an orbital strike, the mark missing the Pillar but scattering right onto the Tau devilfish, destroying it completely.

The stormtroopers advanced in an attempt to gun down the other Hammerhead with their melta gun, but it missed. All they could do was try to kill as many enemy forces as possible now.

Tau turn 5: Tau forces secured control of the pillar, and now decided to attempt to destroy it. Commander Sho’sa swung his Dawn Blade to no avail. The Hammerhead was trying to fire its railgun into the pillar, but no matter what they threw into the pillar, nothing seemed to penetrate it’s outer shell.

Cadian turn 6: Warp storms picked up, and this would spell doom for the Cadian 17th. Heavy weapons teams unable to see their target were unable to fire at the Pillar. Neither could the Master of Ordnance draw aim and call down a strike.

The only unit with any hope was the Leman Russ, and it chose the wrong target ( I chose the pillar and NOT the commander…..my bad). Commander Sho’Sa was injured badly (1 wound left out of 4), but was still alive.

The Stormtroopers fired into the Hammerhead shaking it, extra armor allowing it to continue to move. Colonel Dray looked upon the Pillar, realizing they had loss, he ordered his men to provide covering fire and withdraw their forces.

Tau turn 6: One last desperate gambit to go for maximum points, the Tau tried to destroy the Pillar one last time. The shaken Hammerhead flew off full speed in an attempt to ram the pillar, only to bounce off harmlessly and damage it’s side thrusters. Commander Sho’sa was unable to damage it again with his Dawn Blade.

The battle was over. The Tau forces scored 15 points for controlling the Pillar. They scored an additional 7.5 points for the damage the did to the Cadian 17th. (750 victory points exactly, 750/10 = 7.5) for a total of 22.5.

The Cadian 17th inflicted more damage to the Tau, 1026 points, giving them 10.3 battle points.

Colonel Colwyn Dray pulled his men back. “This did not go as we had planned. This foul chaotic power is nothing we could have made contingencies for.”

As the heavy weapons team pulled back and broke down their gear, the Valkyrie landed. Colonel Dray and his men boarded the transport and made their departure. The Leman Russ Battle tank fired off smoke launchers and used the distraction to make their escape as well.

***** In the end, my tactics and force organization was solid. Had the Pillar not teleported our forces away, the Cadian 17th would have controlled the Pillar first and possibly won the battle. The loss of the Demolisher tank was also unfortunate and robbed the Cadian 17th of some serious firepower.